
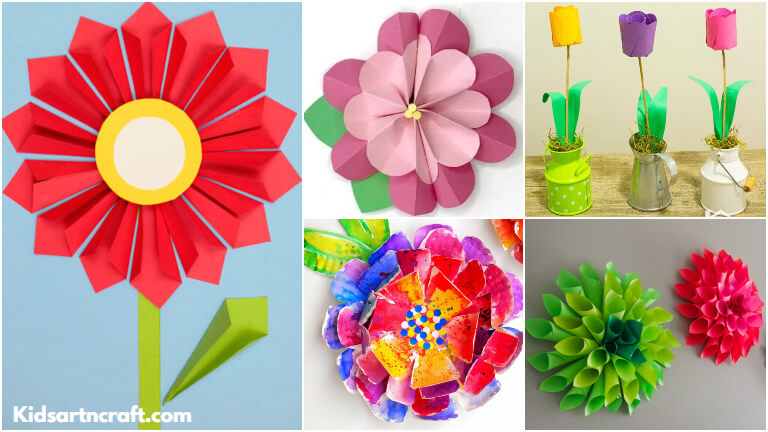
What better way to show someone how much you care than with a super cute handmade paper flower bouquet?! These beautiful carton flowers only take a few minutes to make, and they’re just so adorable.
Kids can make them for Mother’s Day or any time they want to give flowers that will last forever. Plus they’re a great craft to have the kids help with!
1. 3D Paper Tulips
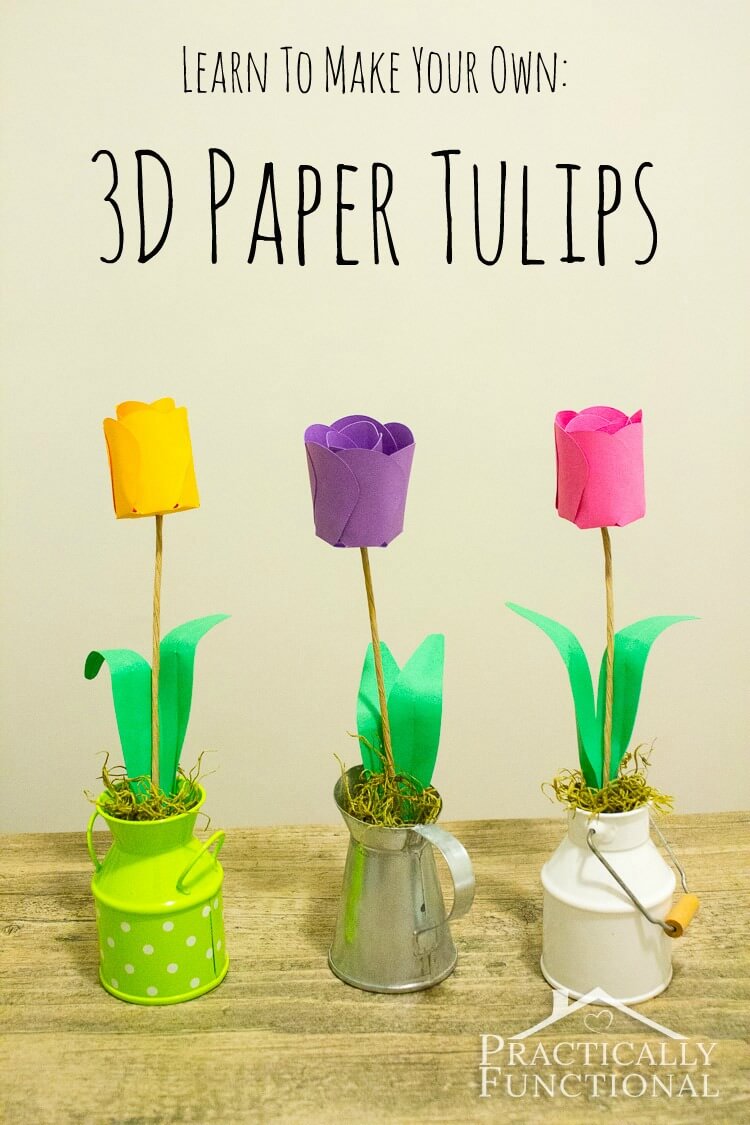
Image Source/Tutorial: Practically Functional
Things Required:
- Green sheet
- Purple sheet
- Yellow sheet
- Pink sheet
- Grass or dry grass
- Container or vase to place them
- Wire
- Covering tape
- Scissors
- Glue
Okay, these tulips look super impressive, but I promise they are way easier than they seem! Let’s get into the simple secret. You’ll start by cutting out lots of circles from colorful sheets like yellow, purple, and pink—around 20 to 30 pieces.
Next, stick them together one by one, half to half. Grab a wire for the stem, place it on the first circle, and just keep rolling until you get to the end. A little glue will hold it tight!
Cover the wire with covering tape to finish the stem. Do this again for all your flowers, then pop them in a container with some grass and cute paper leaves. So charming!
2. Beautiful Paper Flower Craft
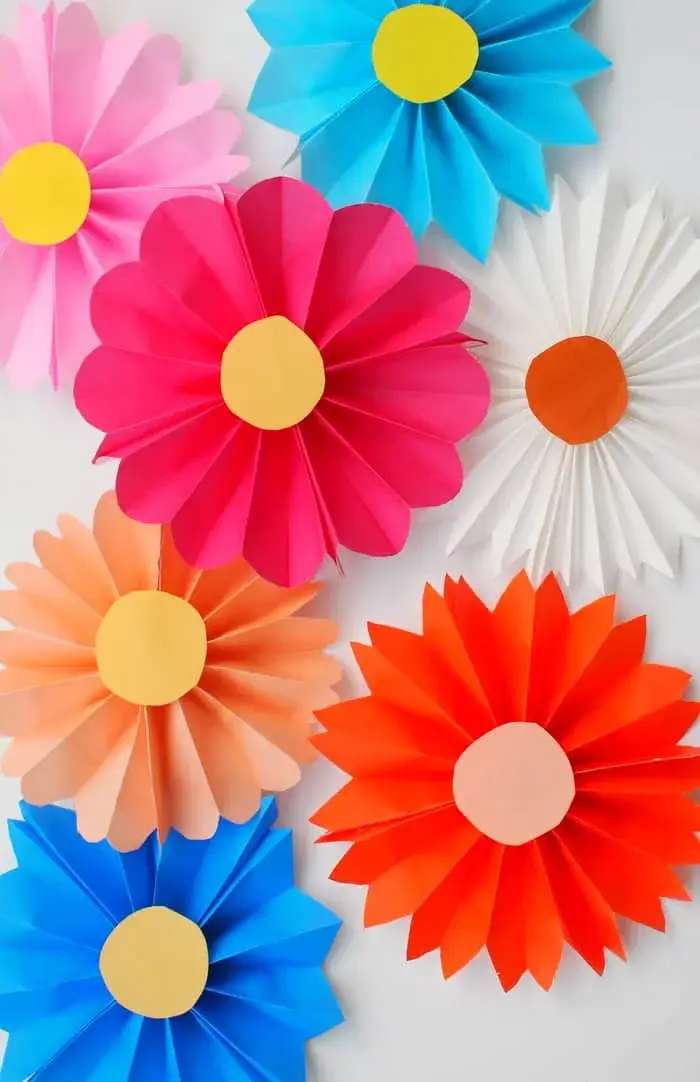
Image Source/Tutorial: DIY Candy
Things Required:
- Blue sheet
- Red sheet
- Orange sheet
- Pink sheet
- White sheet
- Yellow sheet
- Scissors
- Glue
I feel like we’ve all made these accordion flowers once in our lives! It’s such a classic craft, and it’s always fun to make. You don’t need a lot of supplies, just paper, scissors, and glue.
Oh, and your creativity! Start by cutting out some squares in your favorite colors. Then, crease them accordion-style and gather them together at the bottom. Once you’ve done this with several squares, stick them all together to form a flower shape.
To hide the gap in the middle and make it look extra pretty, add a circular piece of paper in a contrasting color. This is one of those fantastic projects for helping kids develop their creative skills!
3. Paper Plate Daffodils Crafts
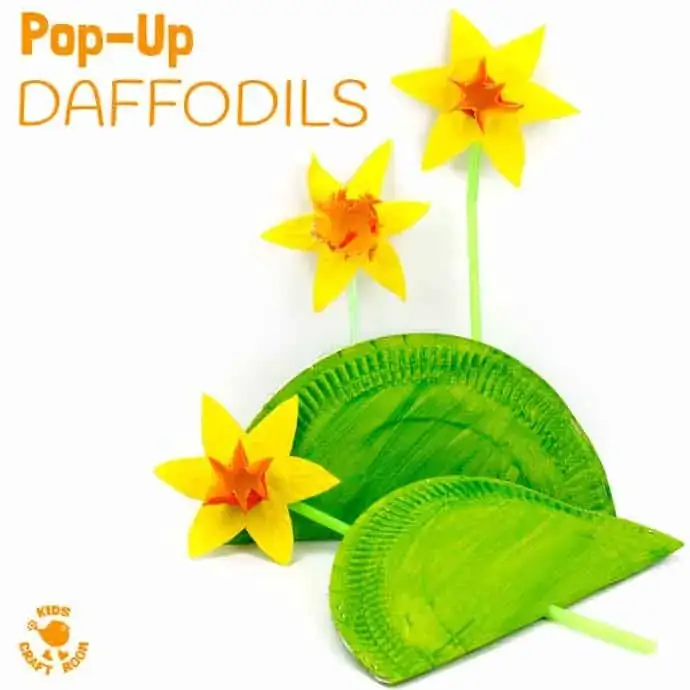
Image Source/Tutorial: Kids Craft Room
Things Required:
- Paper plates
- Green paint
- Paint brushes
- Yellow sheet
- Orange sheet
- Green straw
- Scissors
- Glue
How can you not smile when you see these beautiful daffodils? They’re made from simple paper, and you can find tons of easy tutorials online for them.
You’ll use a combination of yellow and orange sheets, which makes them look so vibrant and beautiful. For the stems, all it takes are some green straws.
To complete the whole look, you can use paper plates painted with green color for the background. It’s such a clever way to finish the craft!
4. Straw Paper Craft Ideas
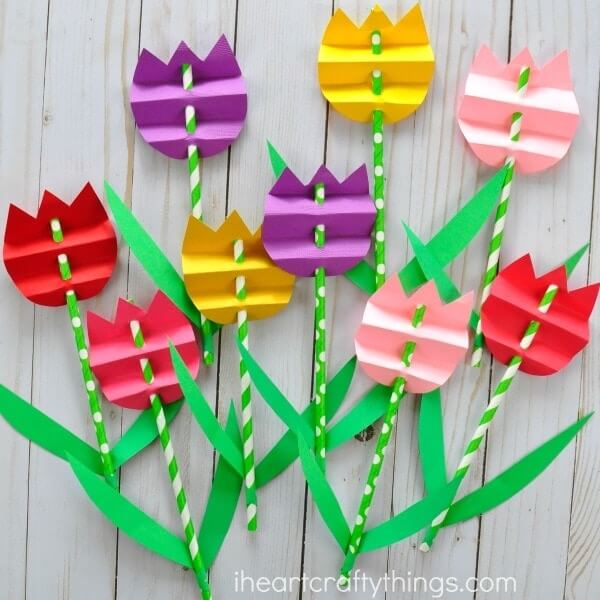
Image Source/Tutorial: I Heart Crafty Things
Things Required:
- Straw
- Red sheet
- Pink sheet
- Green sheet
- Yellow sheet
- Purple sheet
- Scissors
- Glue
This craft creates such beautiful tulips using just paper and straws! First, you’ll need to cut out tulip shapes from different colored paper like red, pink, purple, and yellow.
To give them some dimension, crease them by folding them twice, just like in the picture. After that, make more than one hole in the middle of each flower and pass the straws through them.
This makes the straw look just like a stem! For the final touch, take a green sheet and use scissors to cut out long leaves. Easy peasy!
5. Paper Cone Flowers
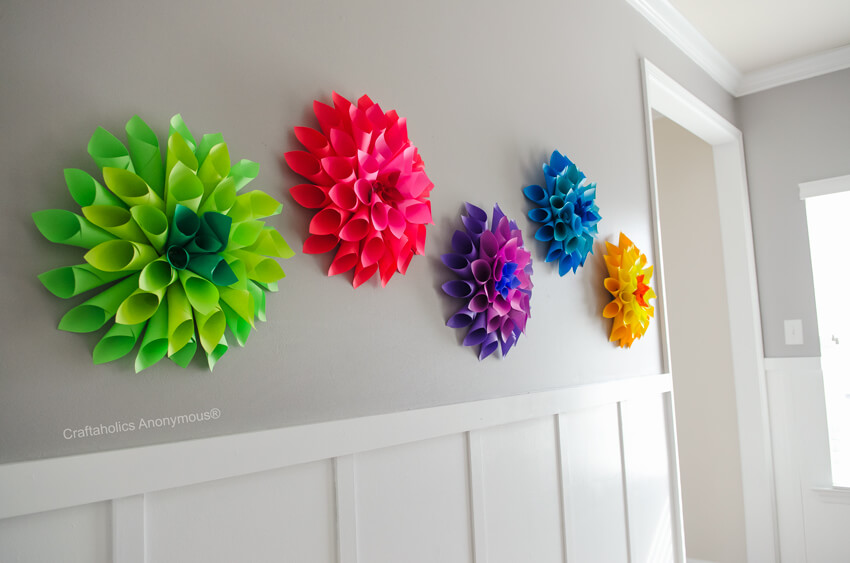
Image Source/Tutorial: Craftaholics Anonymous
Things Required:
- Green sheet
- Pink sheet
- Purple sheet
- Orange sheet
- Blue sheet
- Scissors
- Glue
- Strings or double-sided tape
When you have paper, scissors, and glue, you can create this beautiful masterpiece. First, take your paper and cut it into squares—try to make about 20 to 30 squares of a similar size to keep the petals looking even.
Next, you’ll make a cone out of each square sheet and then stick them one by one toward the center using glue. You can add a really nice contrast by using two different colors, one light and one dark, to make it even more beautiful.
I think trying this with combos like dark and light green or dark and light pink would be so cool for decorating your home!
6. Gorgeous Tissue Paper Flowers
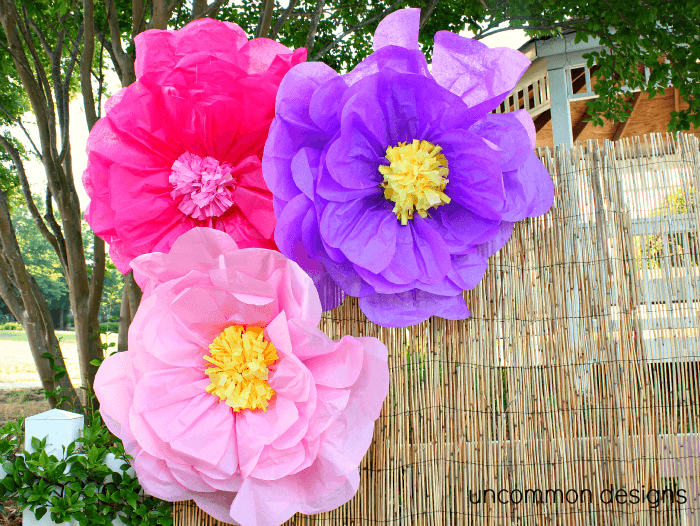
Image Source/Tutorial: thewaystocreate
Things Required:
- Pink tissue paper
- Purple tissue paper
- Dark pink tissue paper
- Yellow tissue paper
- Scissors
- Glue
- Wire
Making this giant tissue paper flower, which looks absolutely gorgeous, is super easy to do. First, you just need to stick tissue sheets together, one by one, overlapping them halfway to form a long, wide strip.
Make about two to four of these strips. Then, take a wire and stick the first tissue strip onto it using glue. Start rolling and keep rolling until you reach the end, then start with another tissue strip to form a big, giant flower.
For the yellow center part, make a long strip just like you did with the pink, and then cut little frills into it. Shape it into a ball and stick it right in the middle of the bigger flower. Let the glue dry, and your flower is ready to go!
7. Very Beautiful Carton Flowers
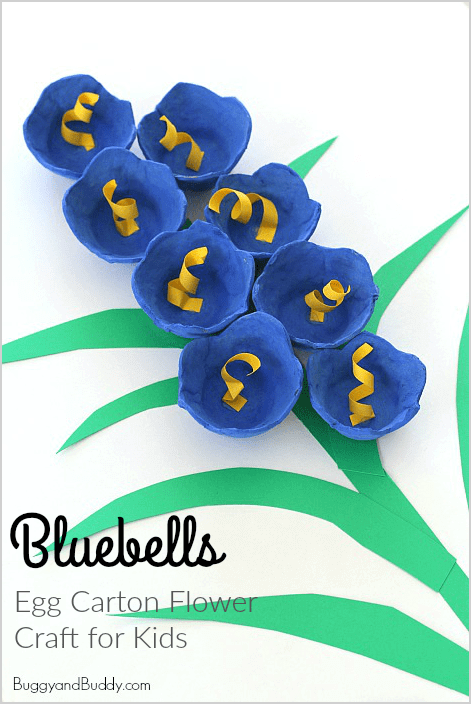
Image Source/Tutorial: Buggy and Buddy
Things Required:
- Waste egg cartons
- Blue paint
- Paint Brushes
- Yellow sheet
- Green sheet
- Scissors
- Glue
We’ve all heard about using old egg cartons, and I love that we’ve found so many different ways to turn waste into something awesome. That’s exactly what’s happening here!
The egg carton is cut up individually, painted with blue paint, and then glued onto a white sheet after it’s dry. To add even more beauty to these lovely bluebells, some strands of a yellow sheet are glued inside.
To complete the whole picture, the stem and leaves are added from a green sheet. Such a great idea!
8. Paper Flower Craft Ideas
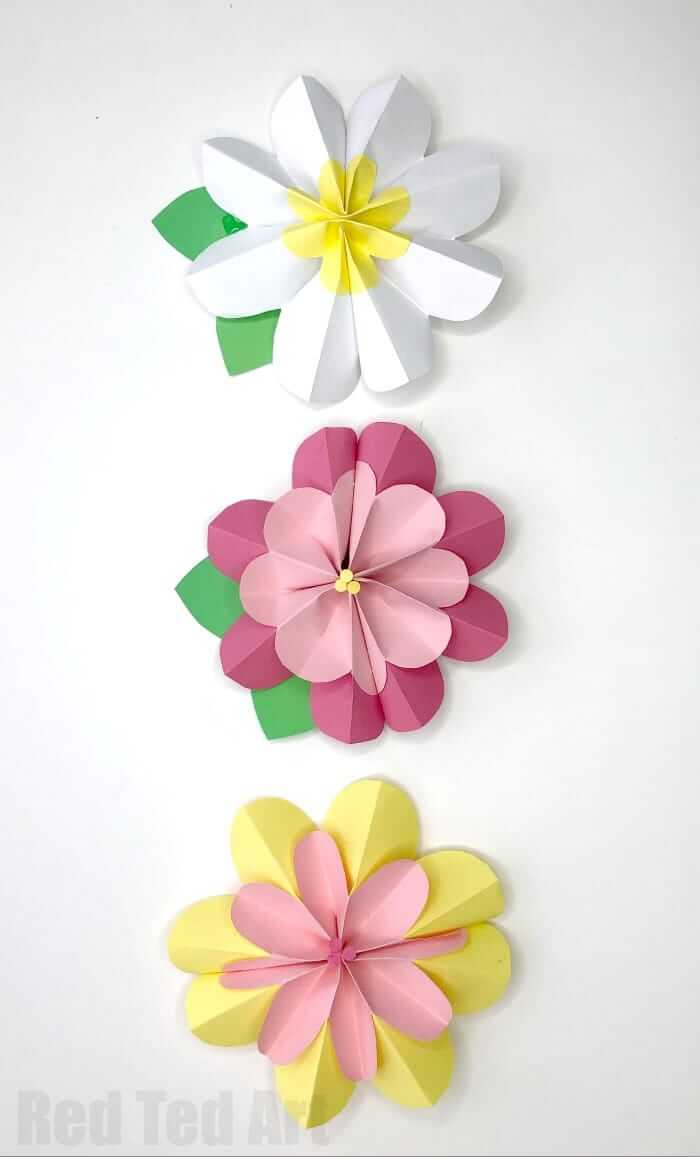
Image Source/Tutorial: Red Ted Art
Things Required:
- Yellow sheet
- Pink sheet
- Dark pink sheet
- Green sheet
- White sheet
- Scissors
- Glue
To make this beautiful flower, you’ll first need to cut out circular or oval shapes from each color except green. Then, just fold them either from the sides or from the middle.
Attach all the similar colored shapes together to create a flower—it can be a group of five to six shapes of the same color. Glue them up to make the flower! Do this with the other colors too.
You can design the flowers however you want, attaching them together to make them look bigger and denser. For the leaves, just take the green sheet, cut them out, stick them on, and your flower is ready!
9. Rainbow Paper Flower Craft
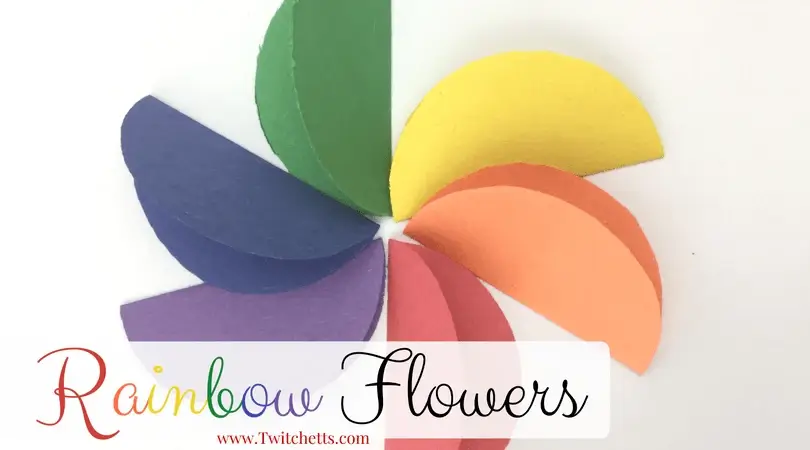
Image Source/Tutorial: Twitchetts
Things Required:
- Orange sheet
- Purple sheet
- Violet sheet
- Yellow sheet
- Green sheet
- Red sheet
- Scissors
- Glue
- White sheet
- Bowl or bangle to trace the circle of equal shape and size
Doesn’t this one look super easy? You’ll take different colored sheets and use a bowl or bangle to trace circles of your desired size. After you trace them, just cut them out. Repeat this process with all the colored sheets.
Once you have all your circles, fold each one in the middle and stick one side onto a white sheet, letting the other half float in the air. Keep doing this with all the other colored sheets to make a beautiful flower, just like the one in the image above!
10. Paper Flower Chrysanthemum
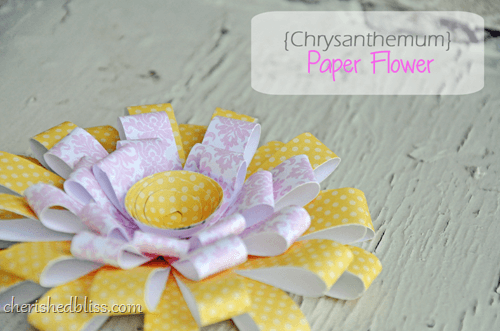
Image Source/Tutorial: Cherished Bliss
Things required :
- Scrapbook paper
- Scissors
- Glue
To make this beautiful flower, you first need to cut out long strips of scrapbook paper. Then, stick the top and bottom of each strip together to form an elongated oval ring.
You’ll want to make more than 10 or 12 of these. Next, cut out a circular disk and start sticking the rings onto it to form the flower. Don’t forget to add a rose in the middle!
To make the rose, just take a long strip, roll it down to the end, and stick that right in the center of the flower. After you stick it all together, let it dry, and your chrysanthemum is all set!
11. Paper Sunflower Craft Ideas
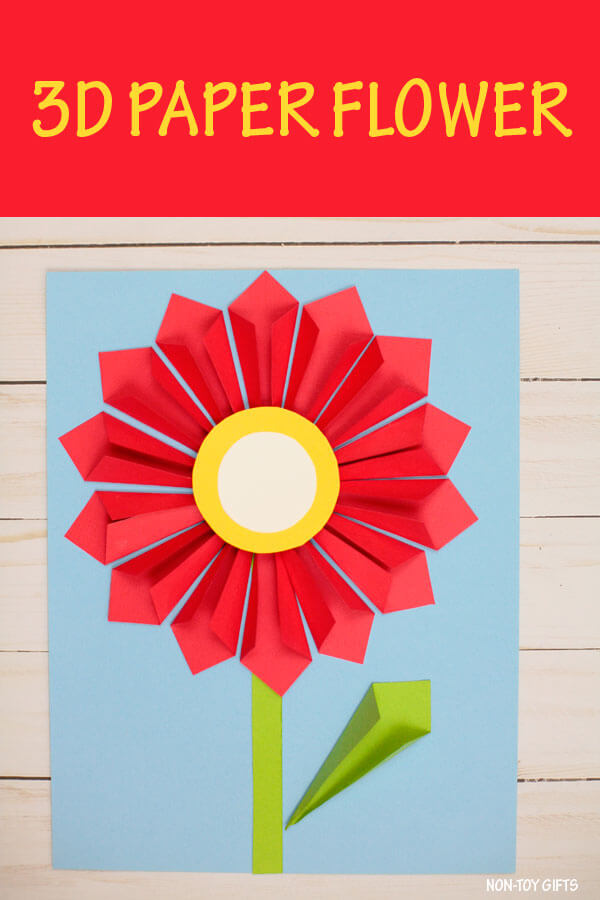
Image Source/Tutorial: Non-Toy Gifts
Things Required:
- Blue sheet
- Green sheet
- Red sheet
- Yellow sheet
- White sheet
- Scissors
- Glue
To make this beautiful red flower, which kind of looks like a sunflower, you’ll cut out red diamond shapes from a red sheet. Then, fold the sides inward so it looks like the image above.
Stick the back side of the petals to a blue sheet in a circular position to form the flower. For the middle part, use a yellow circle cut from a yellow sheet, and to give it an attractive look, add a white circular disc too.
Then it’s time for the stem and leaves! You can cut out the stem from the green sheet and use the same inward-folding technique for the leaf as you did for the flower petals.
12. Paper Flower In A Glass Vase

Image Source/Tutorial: Crafts by Amanda
Things Required:
- Vase or container
- Blue sheet
- Green sheet
- Light blue sheet
- Red sheet
- Pipe cleaners
- Straw
- Designer paper
- Scissors
- Glue
These flowers might look tricky to make, right? But wait, it’s not hard at all! Let’s take a look at how it’s done. First, cut a sheet of your choice into a square, then stick a smaller square of designer paper on top.
Once that’s fully dried, cut at some angles, and then transform the square into a cone and stick it together. Use a pencil to fold the cuts to make the petals look like they’re really bent.
Then, you can insert pipe cleaners through the hole in the cone to create the stem. Repeat this process for every flower. I think making a whole bunch of them would look like a beautiful bouquet in a container!
13. Paper Plate Painted Flower Crafts
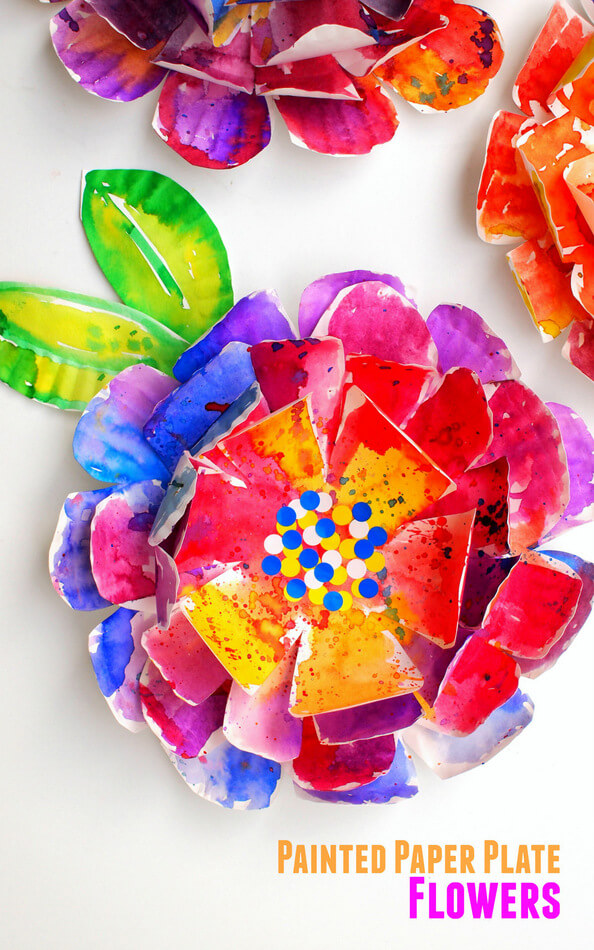
Image Source/Tutorial: Pink Stripey Socks
Things Required:
- Paper plate
- Different color water paints
- Paint Brushes
- Water
- Bowl
- Scissors
To create this beautiful flower, you’ll first need to cut out the paper plates from different sides and at different angles so the petals look folded and real.
After you’ve cut the first one, you’ll need to cut more plates, but each time you do it, use a plate with a smaller diameter than the last. Then, you just need to paint them as shown in the picture above.
After the paint dries, simply stick them all together according to their diameter. It’s so much fun!