
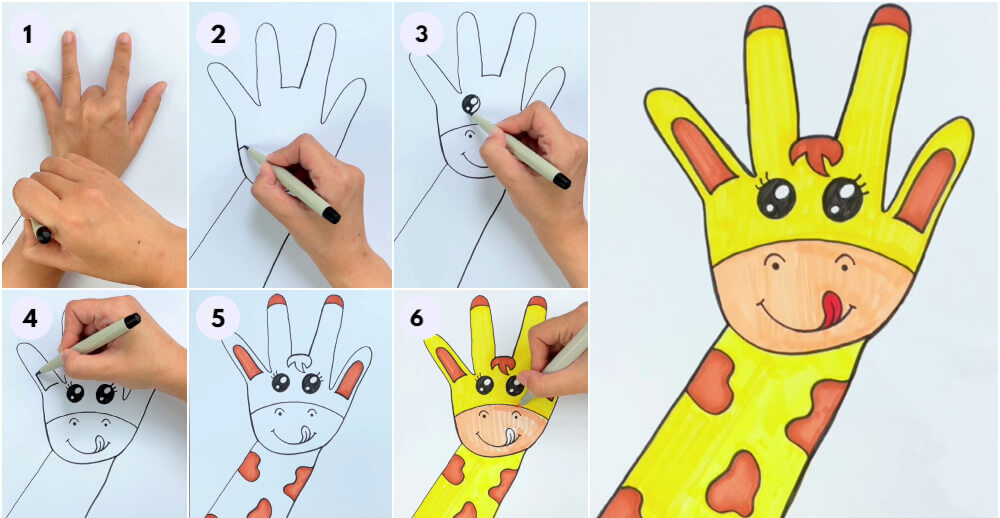
This straightforward guide will help you produce a lovely handprint giraffe illustration!
Crafting artwork offers a fantastic avenue for personal expression, also serving as a wonderful pastime to share with children. Should you seek an enjoyable, inventive project for your little one, crafting this marvelous handprint giraffe artwork presents an excellent option.
This provides more than just an entertaining pastime, it also provides a superb method to nurture imagination and connect with your child. Using only some basic supplies, you and your kid can fashion a distinctive and lovely artistic creation meant for lasting enjoyment.
Required Supplies:
- White Paper
- Black Marker
- Yellow Paint
Instructions
First Stage: Creating the Hand Outline
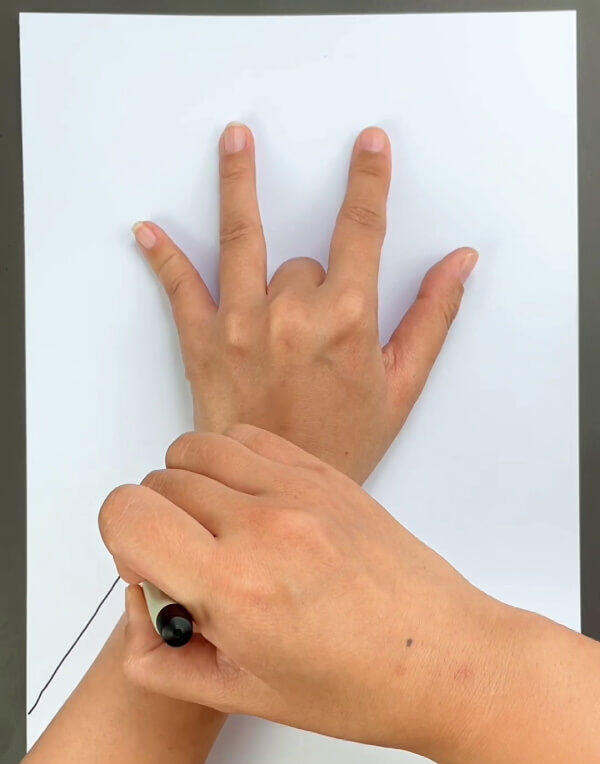
Bend your middle finger, extending all other digits, then place your hand onto the paper. Grab a black marker and trace around the boundary of your hand on the paper.
Second Stage: Completing the Exterior
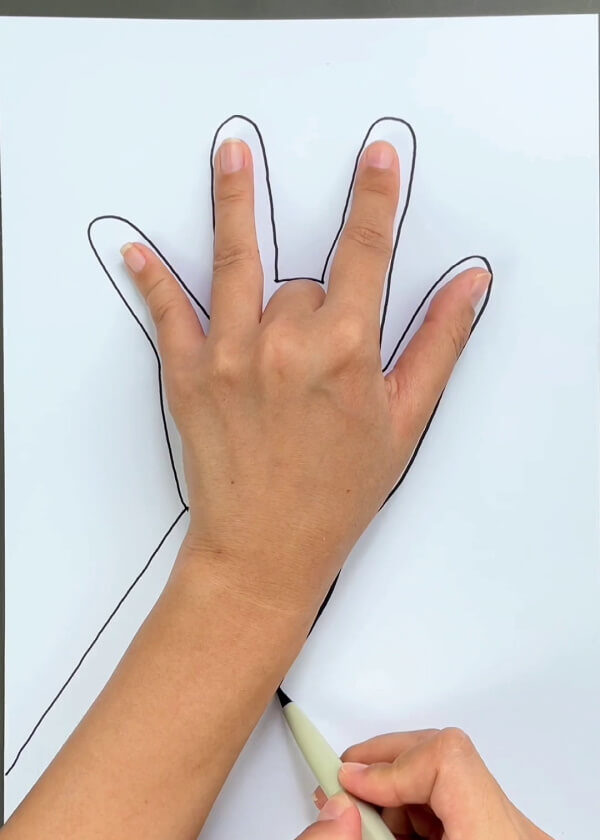
Make the entire hand shape visible on the sheet.
Third Stage: Drawing the Giraffe’s Snout
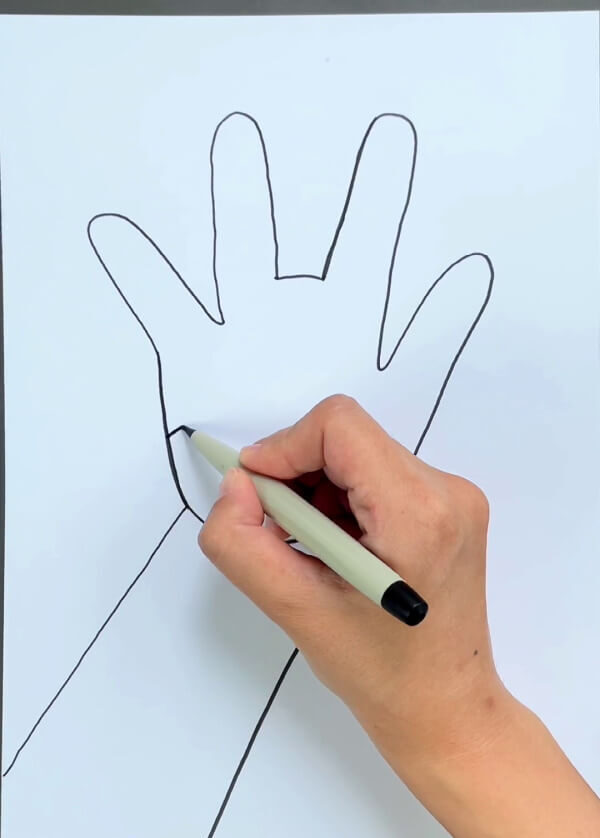
Use the black marker to define the palm area and the giraffe’s mouth.
Fourth Stage: Adding a Nose and Grin
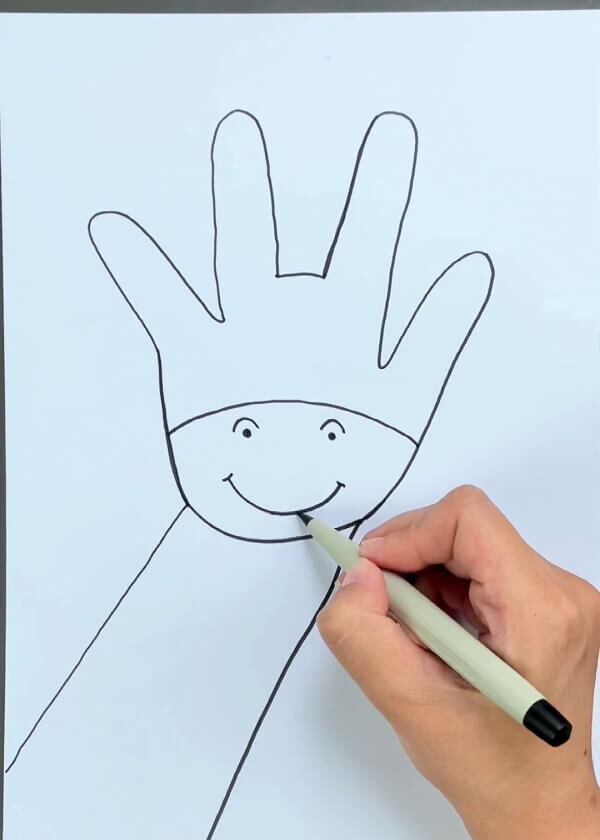
Place two dots for the nostrils and draw a curved line to form a smile.
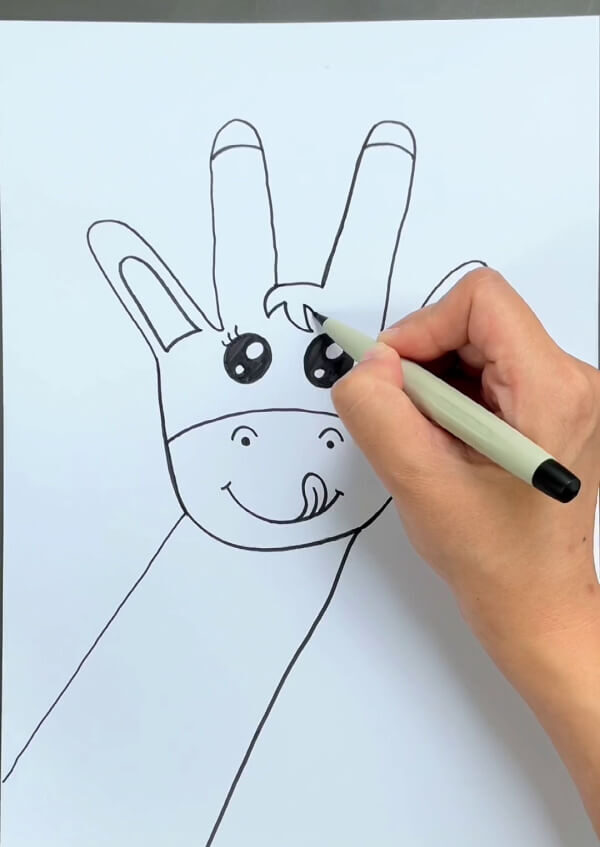
Fifth Stage: Forming the Giraffe’s Eye
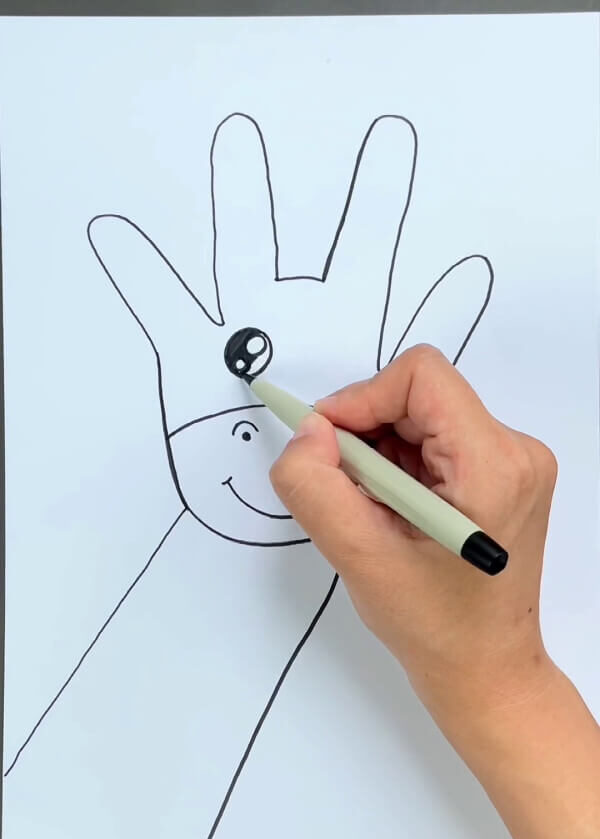
Draw a circle beneath the fingers, filling it with black, leaving two smaller circles uncolored.
Sixth Stage: Creating the Second Eye
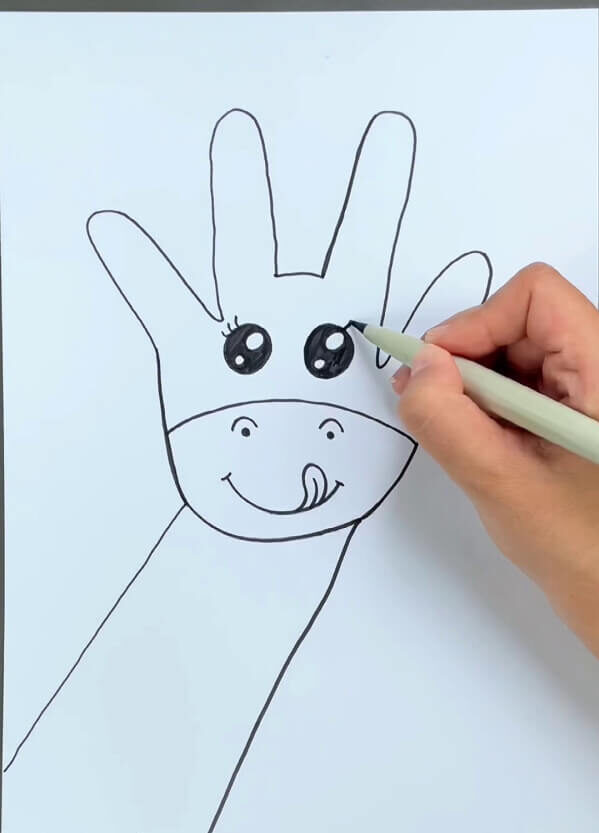
Fashion the other eye in an identical fashion and add eyelashes to both. Include the giraffe’s tongue as well.
Seventh Stage: Designing Inside the Small Finger

With a black pen, draw an enclosed shape inside the little finger.
Eighth Stage: Replicating the Design Inside the Thumb
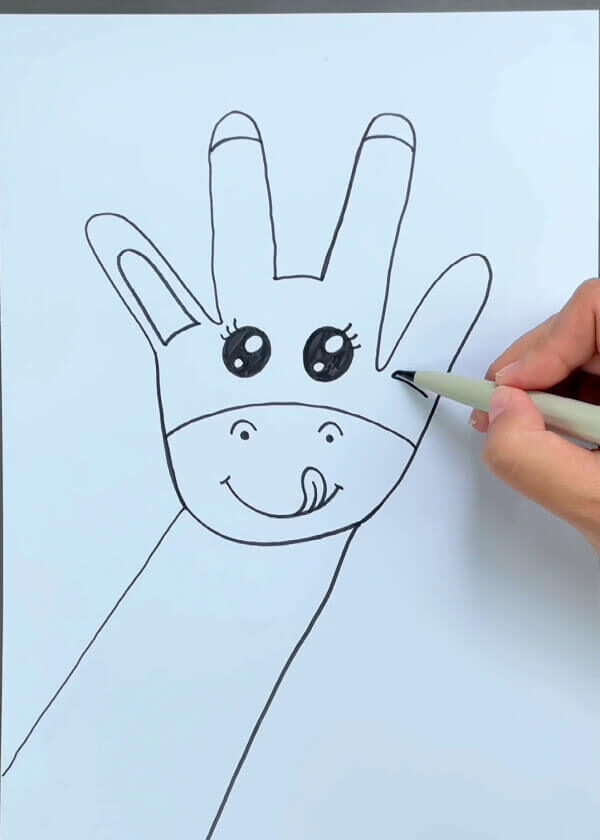
Make the identical pattern within the thumb and sketch curves beneath the tips of the remaining fingers.
Ninth Stage: Drawing the Giraffe’s Mane
Add hair on the palm section, positioned between the middle and ring fingers.
Tenth Stage: Adding Body Patches
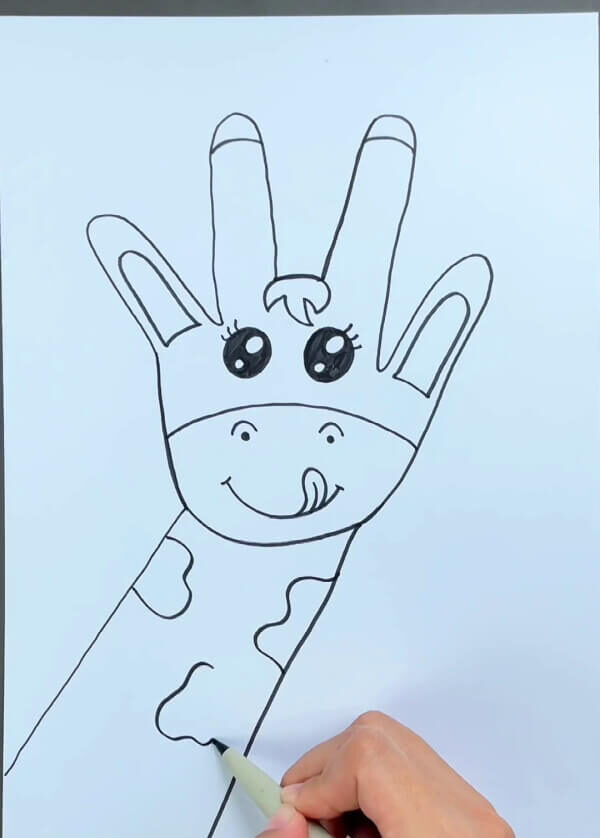
Create cloud like designs on the giraffe’s body.
Eleventh Stage: Coloring Enclosed Sections Red
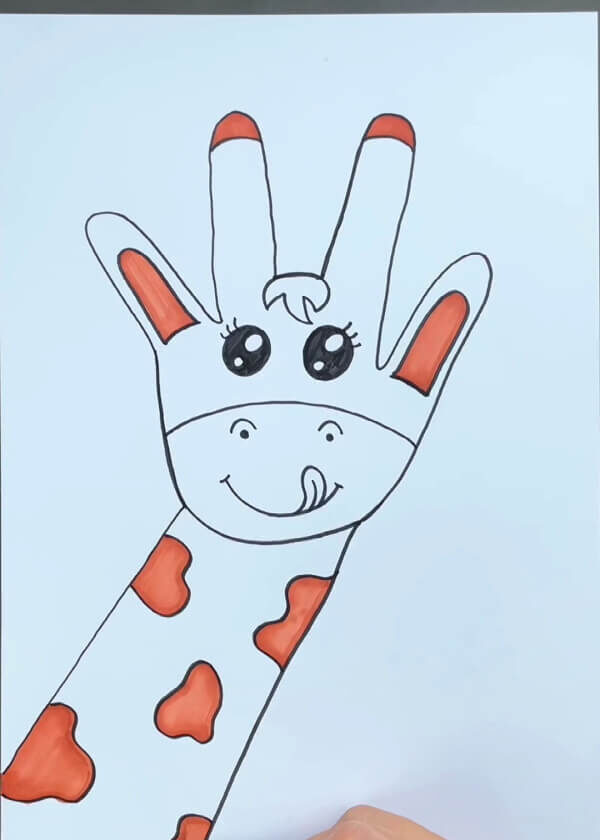
Pick up a red marker and fill the patches on the body, also coloring the closed patterns on the fingers.
Twelfth Stage: Applying Yellow Color
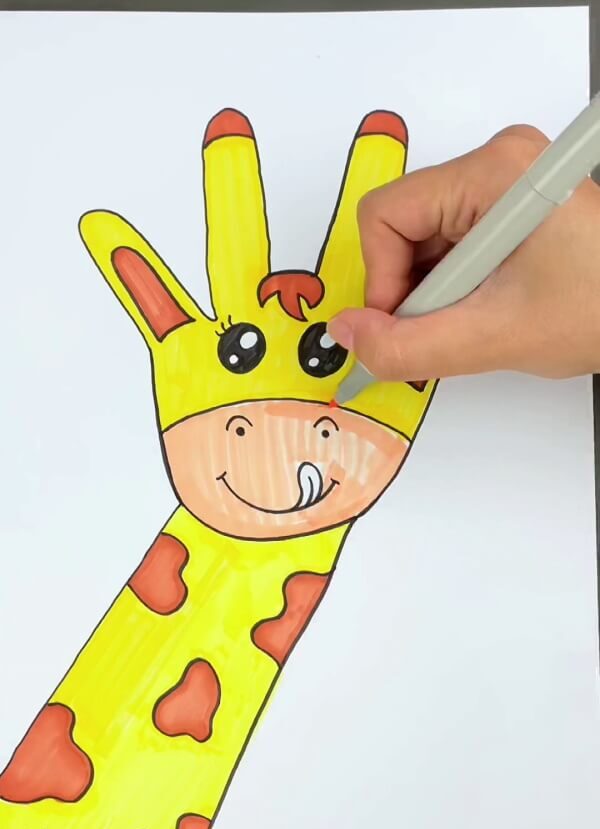
Color the body yellow and the area above the mouth, then fill the central mouth section with a cream hue.
Last Stage: Your Giraffe Appears!
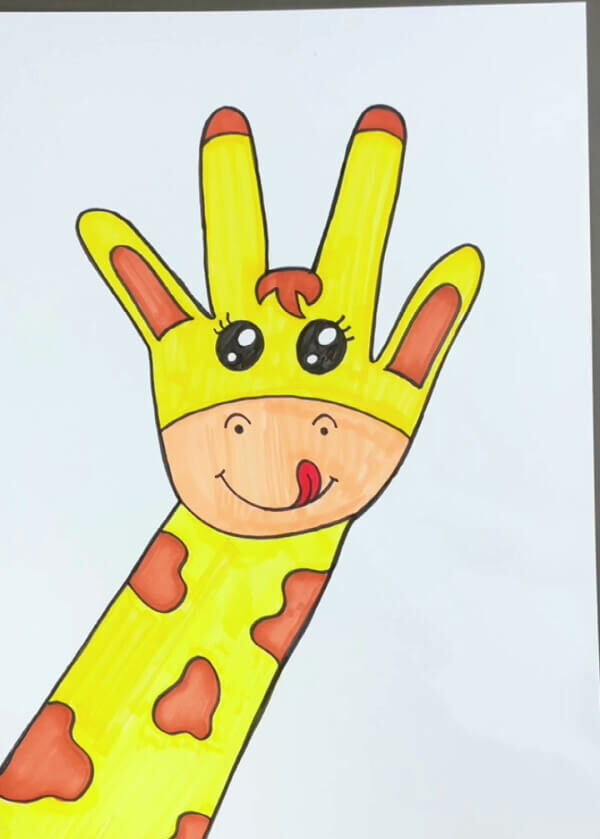
This giraffe is easily made simply by using a handprint.
This fun, imaginative project is perfect for any child. They can find joy in designing their own giraffe artwork using peanut shells! It is a superb pastime for encouraging children to exercise their creativity and explore their artistic abilities.
FAQs
Which kind of paint works best for this handprint giraffe artwork?
Acrylic paint stands out as the top choice for this particular endeavor, being both safe and simple to clean.
What kind of paper should I utilize for the artwork?
Watercolor paper proves ideal for painting, due to its absorbency and resistance to wrinkling when wet.
Is a specific brush necessary for the painting process?
No, a standard paintbrush will perform effectively.
How much time is required to finish the artwork?
Depending on the project’s dimensions and the design’s intricacy, completion may take roughly one to two hours.
Can I employ shades other than yellow and brown for the giraffe’s markings?
Yes, you are free to use any preferred shades for the markings.
This handprint giraffe painting artwork provides a wonderful opportunity to showcase your artistic flair and share enjoyable moments with your household!