
Are you hoping to build an enjoyable and imaginative project with your children? You’ve come to the perfect place for this cardboard ice cream endeavor! This straightforward handbook instructs you on assembling a three dimensional ice cream from cardboard in only a few uncomplicated stages.
This particular activity is ideal for a creative afternoon spent with your youngsters, since it is both entertaining and simple to put together. Therefore, gather some cardboard and prepare for some enjoyment!
Items Needed:
- Cardboard
- Colored Papers
- Ice-cream Stick
- Glue
- Scissors
Explore Further: Beautiful House Craft Tutorial With Cardboard And Cotton Swab
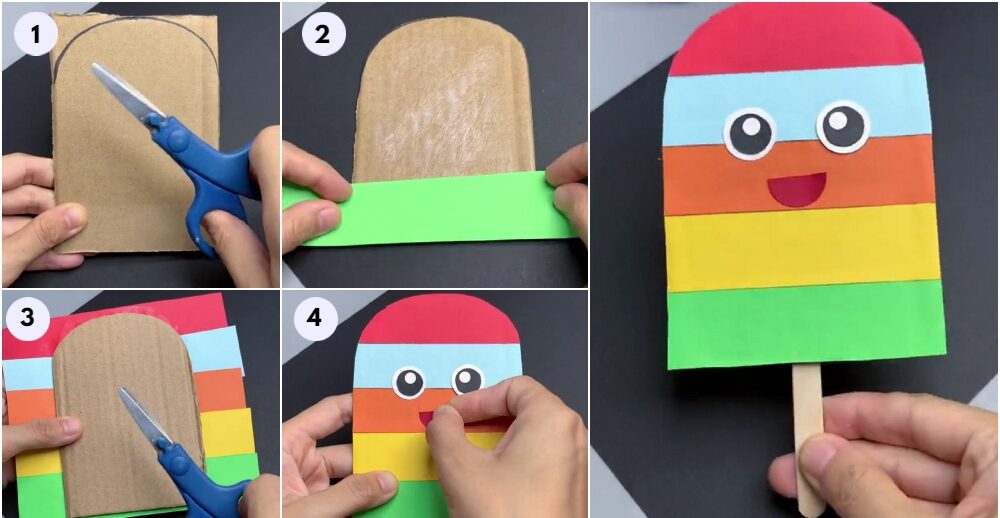
First Step: Crafting the Ice Cream Form
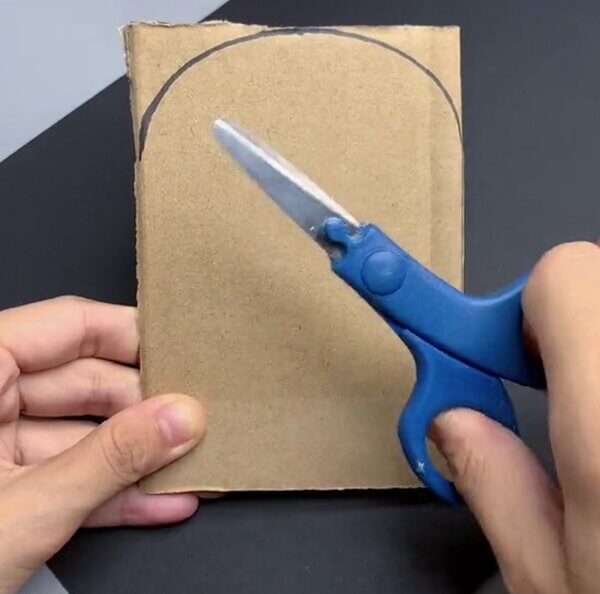
Begin by shaping the cardboard into an ice cream form. Sketch an ice cream themed boundary onto the cardstock, then trim it with shears.
Second Step: Applying Adhesive
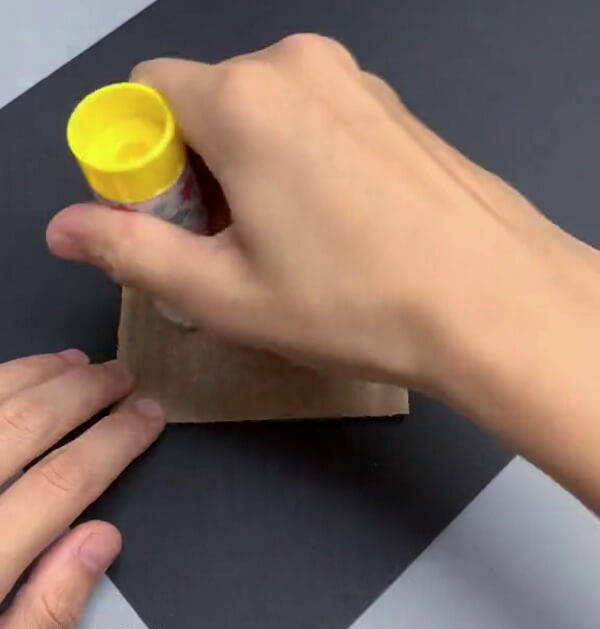
At this point, brush the adhesive onto the carton’s exterior.
Third Step: Attaching Paper
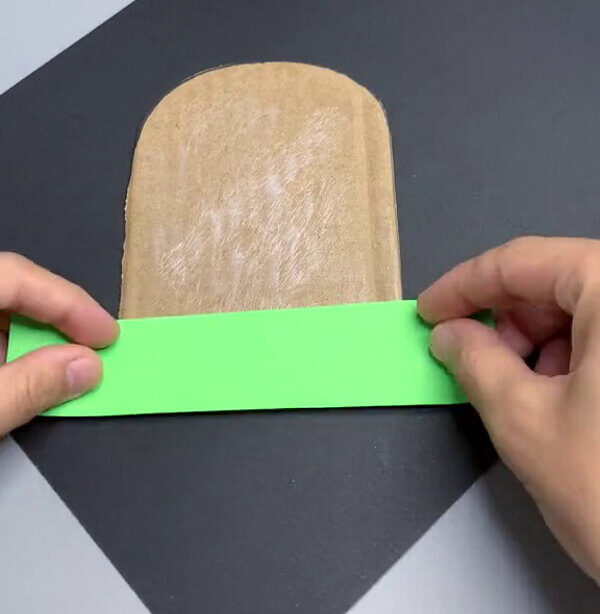
Get vibrant sheets and slice them into rectangular forms. Next, attach them to the cardboard individually.
Fourth Step: Placing Paper onto the Ice Cream
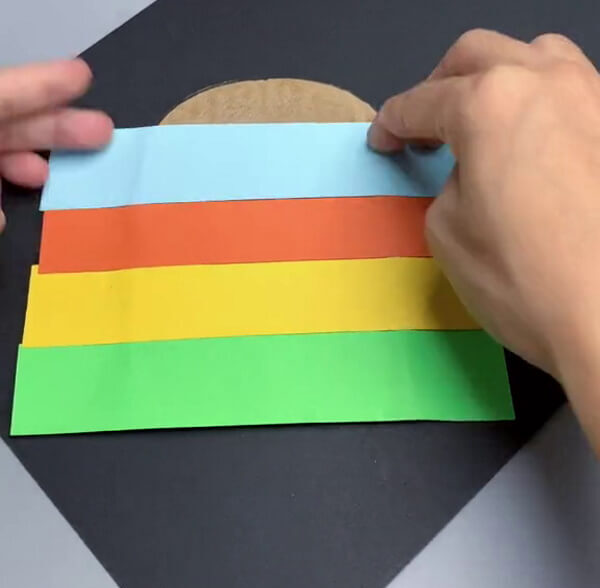
Affix four or five colored pages to create the ice cream’s hue.
Fifth Step: Trimming the Sheets
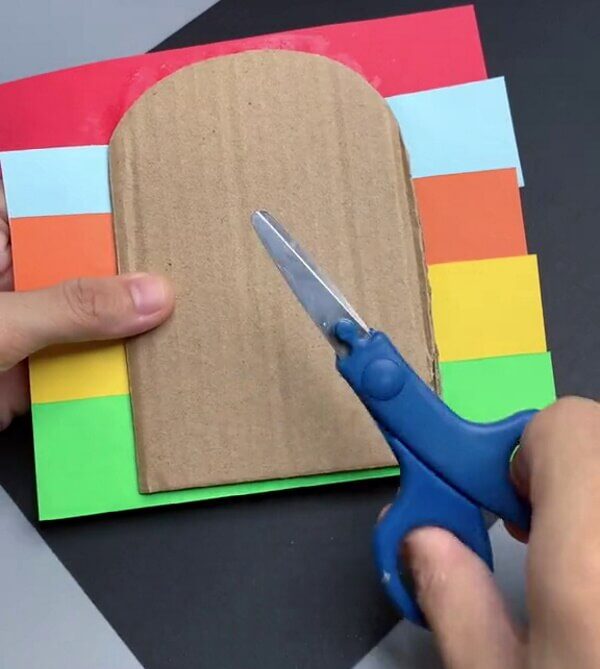
Then, flip the cardboard and trim any excess paper, matching the shape of the cardboard to achieve a tidy appearance.
Sixth Step: Securing the Stick
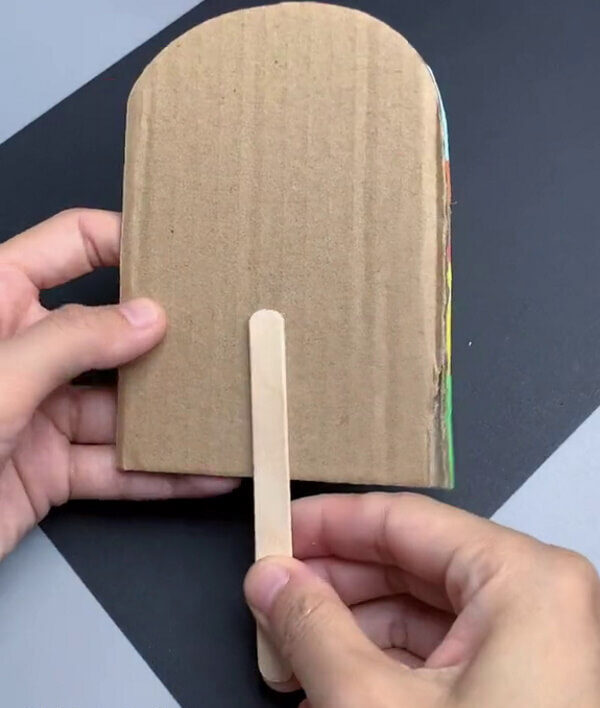
Attach an ice cream bar to the back of the cardboard with adhesive.
Seventh Step: Creating the Eyes
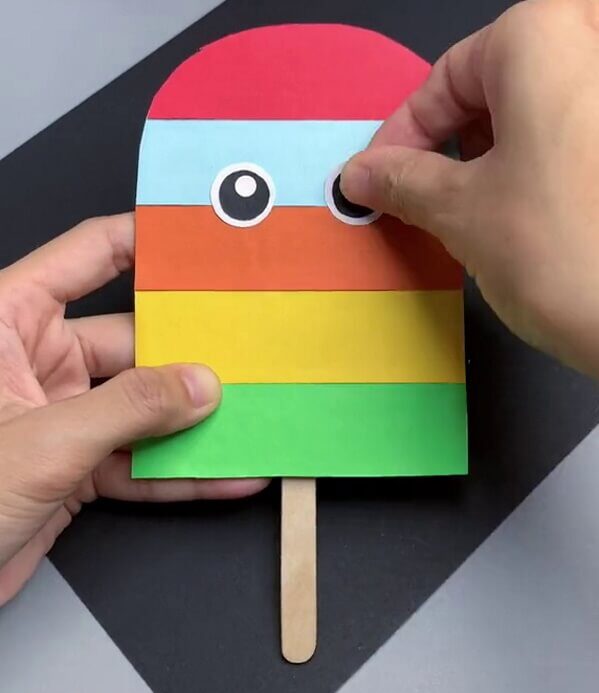
Craft the ice cream’s expressive eyes using dark and light paper.
Eighth Step: Giving It a Grin
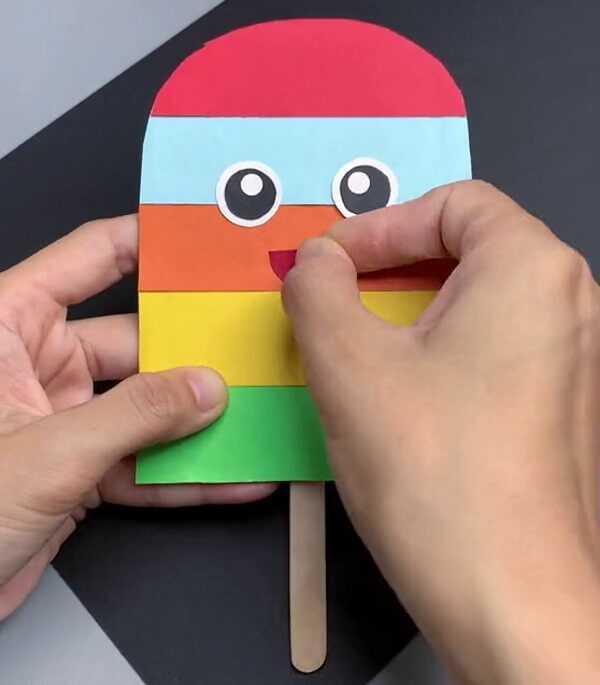
To conclude, give the ice cream a cheerful expression by adhering a tiny crimson half circle to its front.
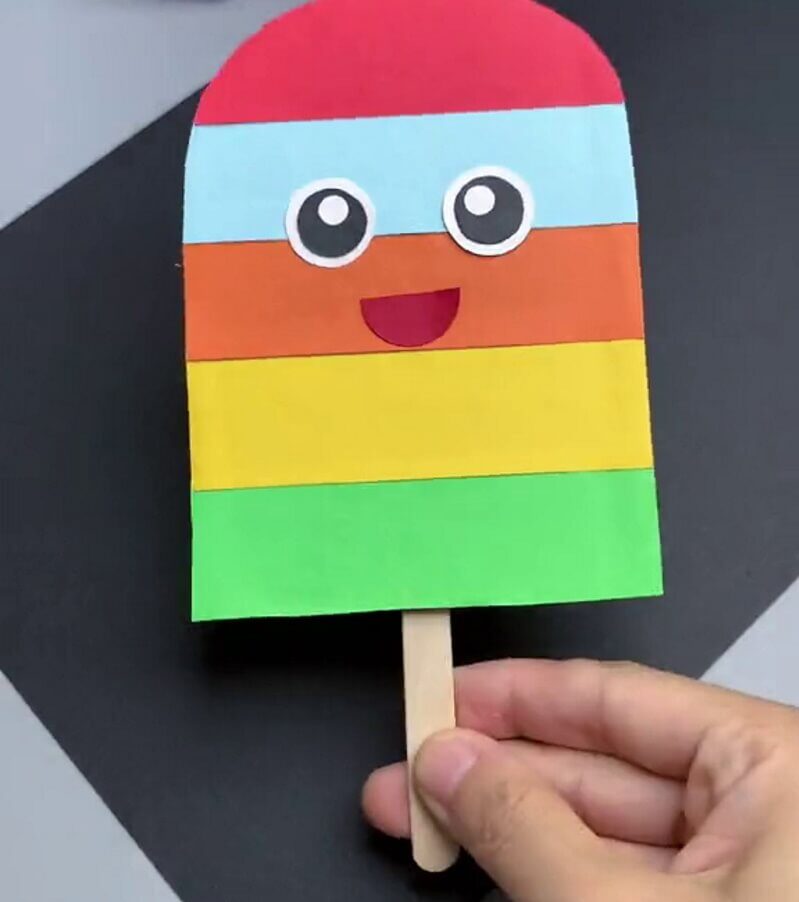
Completed View – My Cheerful Ice Cream is Done!
This cardboard ice cream activity offers a straightforward and enjoyable method to introduce some creative flair into your day. Utilizing just a handful of basic items and a touch of imagination, you can fashion a charming ice cream creation that will brighten your mood. Savor this season with your young ones.
Constructing an ice cream project from cardboard provides a delightful and simple path to artistic expression! With merely some basic materials and a few uncomplicated actions, you can fashion your personalized, handcrafted ice cream item.
Common Questions
1. What materials are needed for the cardboard ice cream project?
You will require cardboard, a box cutter or shears, writing tools, and other necessary items like adhesive, shimmering powder, and foam cutouts or decals.
2. What specific type of cardboard works best?
Robust cardboard, like that from delivery or relocation containers, performs optimally.
3. How should the cardboard be cut?
Use a box cutter or shears to divide the cardboard into the chosen forms.
4. Which embellishments can be used?
Markers, adhesive, sparkling dust, foam cutouts, or decals can be used to adorn the cardboard ice cream piece.
5. What is the proper way to put together this craft?
Start by cutting the cardboard into the preferred designs, then decorating them with markers, adhesive, shimmering powder, and foam cutouts or decals. After the ice cream is embellished, construct the project by joining the various components with glue.
6. How can a lifelike appearance be achieved for the ice cream?
Incorporate various materials to give the ice cream a convincing and three dimensional look. Try using felt, cloth, chenille stems, fasteners, and other raised elements.