
This is a simple, step by step guide for children on how to make a paper leaf using folds! This is a delightful and simple project requiring only a few basic items.
This guide will walk you through the folding and cutting steps to craft a lovely leaf from paper. It is a fantastic activity suitable for all ages, perfect for creating decorative items, greeting cards, or even small presents. So, gather your materials, and let’s begin!
Required Supplies
- Green colored paper
- Scissors
How To Make It
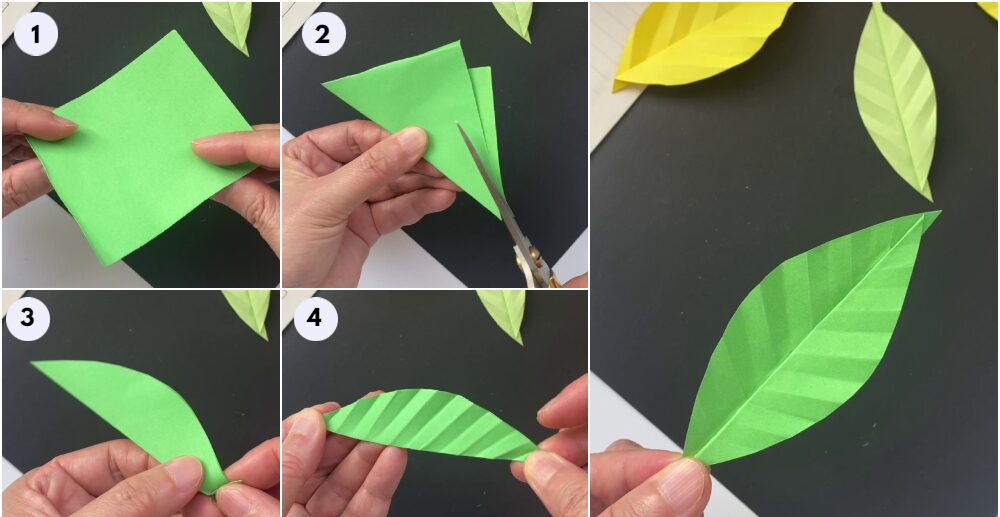
Step-1: Get Your Square Green Paper
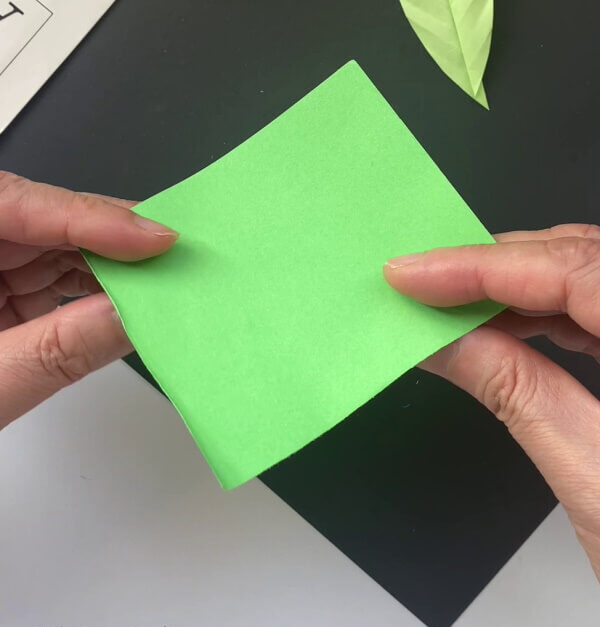
Start by picking up a piece of square green paper, as illustrated.
Step-2: Create a Mountain Fold with the Green Paper
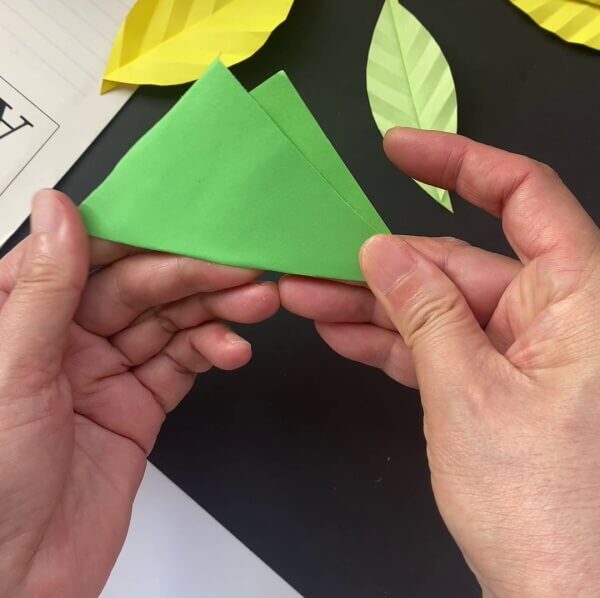
Next, fold the green paper to form two distinct triangles, resembling a mountain shape, as displayed.
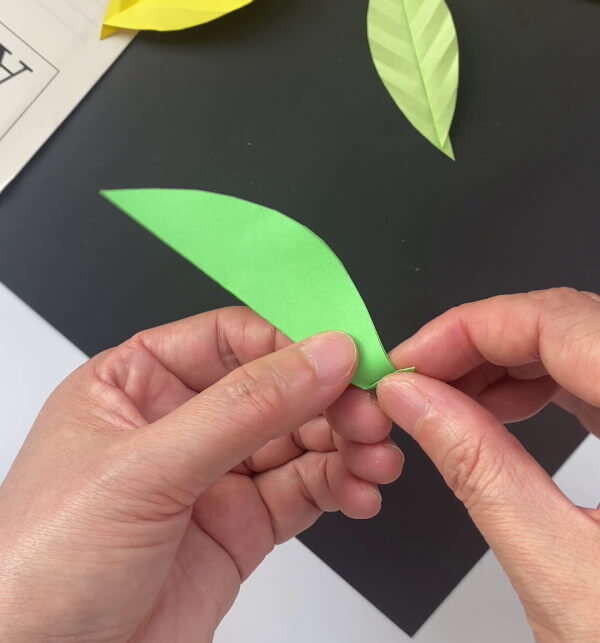
Step-3: Shape the Leaf by Cutting
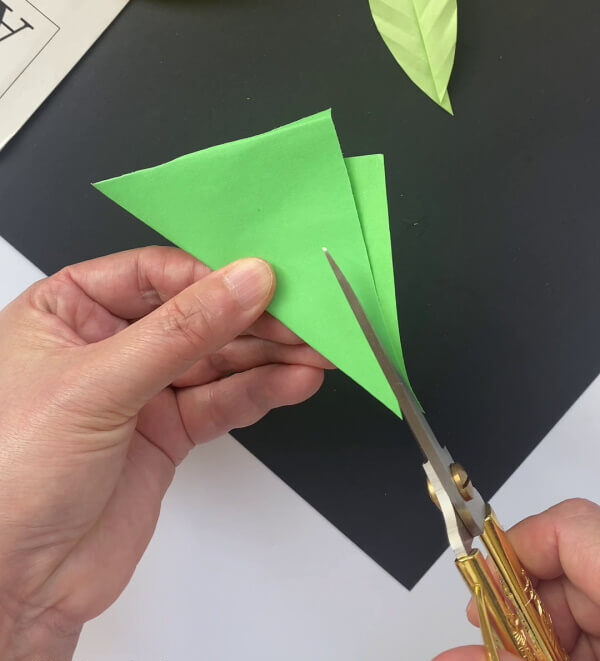
Holding the paper firmly along its closed edge, carefully cut a semi-circle to define the leaf’s outline.
Step-4: Make Creases to Form Leaf Veins
Now, take one end of the folded leaf and make a small fold in that section.
Step-5: Continue the Zigzag Folding Pattern
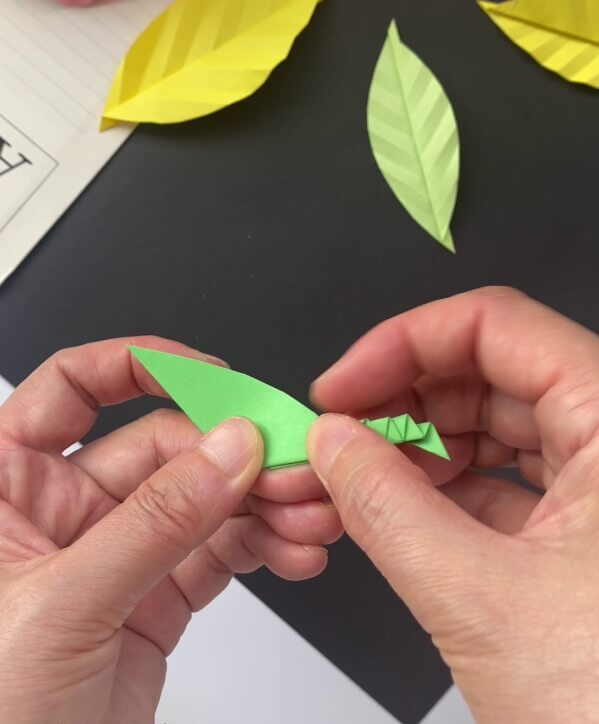
Then, take that same section and fold it back in the opposite direction, creating a zigzag pattern, as you can see in the picture. Repeat this until reaching the leaf’s end.
Step-6: Reveal the Veins by Unfolding the Pattern
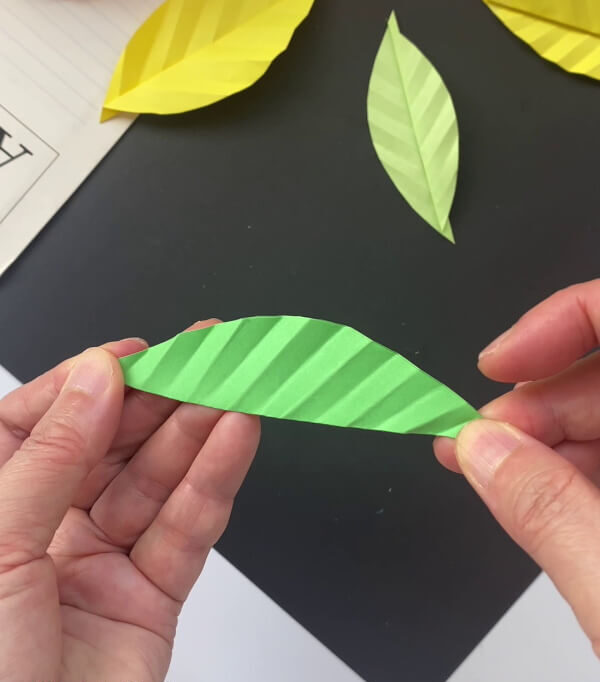
Afterward, gently unfold the zigzag pattern to reveal the creased veins, as shown in the image.
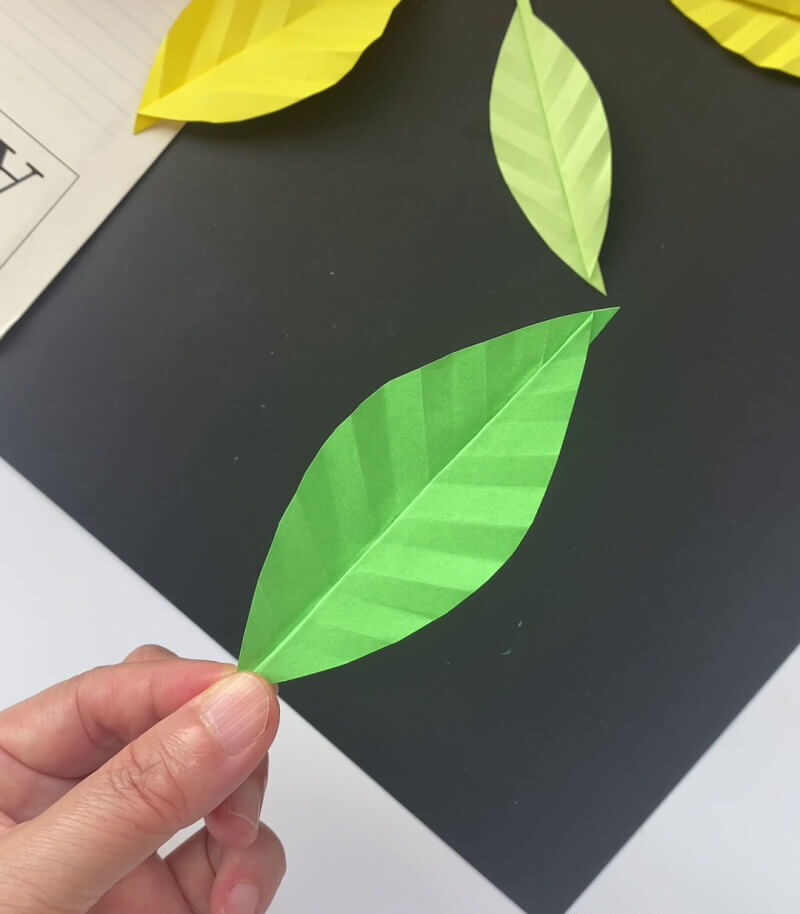
Step-7: Create a Small Inward Fold Along the Edge

To finish, make a small fold inward along the closed edge. Then, unfold the paper completely to see the leaf’s final appearance.
Here’s the Finished Folded Paper Leaf Craft!
Great job! You have now completed a beautiful folded paper leaf craft. This craft is a wonderful way to express creativity with paper and create something truly lovely! With a touch of patience and imagination, you have transformed a simple paper sheet into a distinct and attractive art piece. In just a few easy folds, you can craft a special leaf decoration for any room at home. Enjoy!
This uncomplicated paper fall leaf craft offers a straightforward and fun method for children to celebrate the autumn season. It’s an excellent opportunity to engage imagination and explore various colors, textures, and shapes while producing a delightful artwork.
FAQs
1. What items are needed to craft a folded paper leaf?
You will need paper, scissors, glue, and any additional embellishments you wish to include.
2. How can I decorate my paper leaf?
You can add any decorations you prefer, such as markers, stickers, glitter, glitter glue, or anything else you can imagine.
3. How do I attach the leaf to my creation?
You can attach the leaf to your project using glue, tape, or even staples.
4. What other shapes are possible to make with paper?
You can create any shape you like using paper. You might try circles, triangles, squares, or even stars.
5. Can I use different paper colors for my leaf?
Absolutely, you can choose any paper color you desire.
6. Which kind of paper should I use for my leaf?
You can use any type of paper, but thicker options like cardstock or construction paper generally work best.
7. Is it possible to make a bigger leaf?
Yes, you can create a larger leaf by simply cutting the paper to a greater size.
This detailed guide for children teaches them how to make a folded paper leaf. Through a few easy actions, any child can fashion a beautiful folded paper leaf that they will proudly display to their friends and family. This project is excellent for kids of all age groups. It’s simple, yet encourages creativity, allowing them to express themselves and their imaginative spirit.