
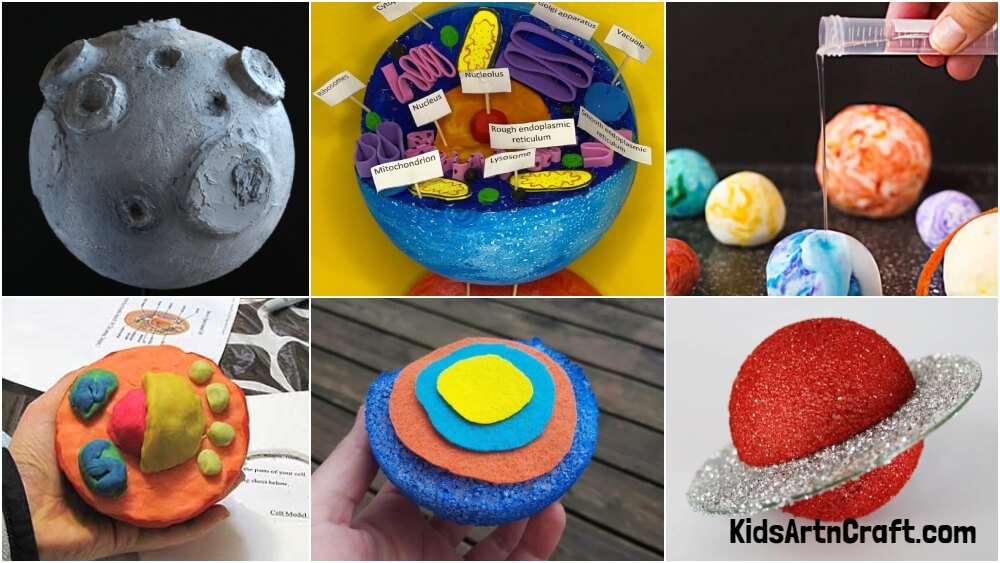
Are your kids fascinated by science projects? Well, grab some Styrofoam balls and craft paint! We’re making homemade solar system models for the upcoming science fair, using one of our all-time favorite project techniques.
The process is easy and fascinating, and the results are out of this world! If your kids love easy science activities, they’ll want to try this one for sure.
1. Sparkling Saturn Craft
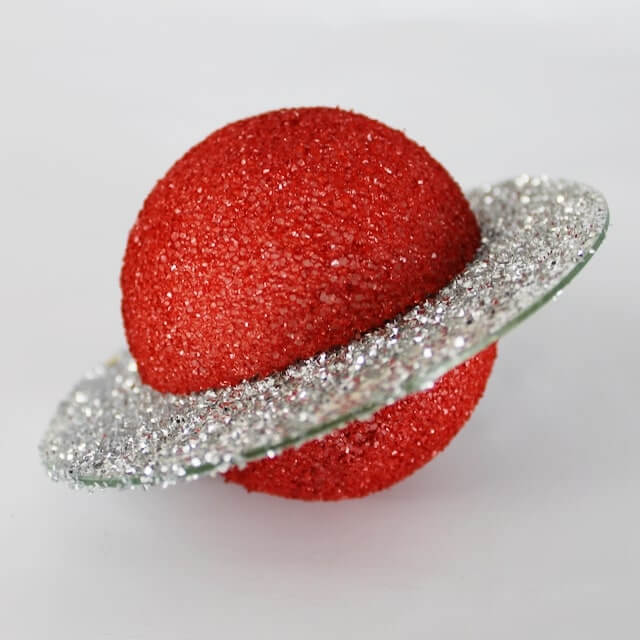
Image Source/Tutorial: Crafty Your Happiness
Materials Required:
- 3″ Styrofoam Ball
- Spray Paint Color Of Choice
- CD Or DVD With No Label Or Writing Preferably
- Glitter Of Choice
- Spray Adhesive
- Hot Glue Gun Or Any Thick Adhesive
- Fishing Line And An Eyelet Hook
- Wood Base And Dowel
- Drill For Stand.
This glittery Saturn model is such a simple and dazzling idea for kids to create as a science project. I’ve found that even kindergartners get a huge kick out of this activity.
It’s a total blast for them and you should definitely try it at home. There’s nothing tricky about this one. To make this charming craft, grab a CD or DVD and put some glue on it.
To get that classic ring look, you’ll sprinkle silver glitter all over it. Next, get a Styrofoam ball, cut it in half, and coat it with glue. Now for the fun part: cover it in red glitter!
Stick these halves on both sides of the CD and let it dry. You can even add a screw to the top if you want to hang it up. Your project is all finished! It’s perfect for decorating a science lab.
2. Realistic Moon Model
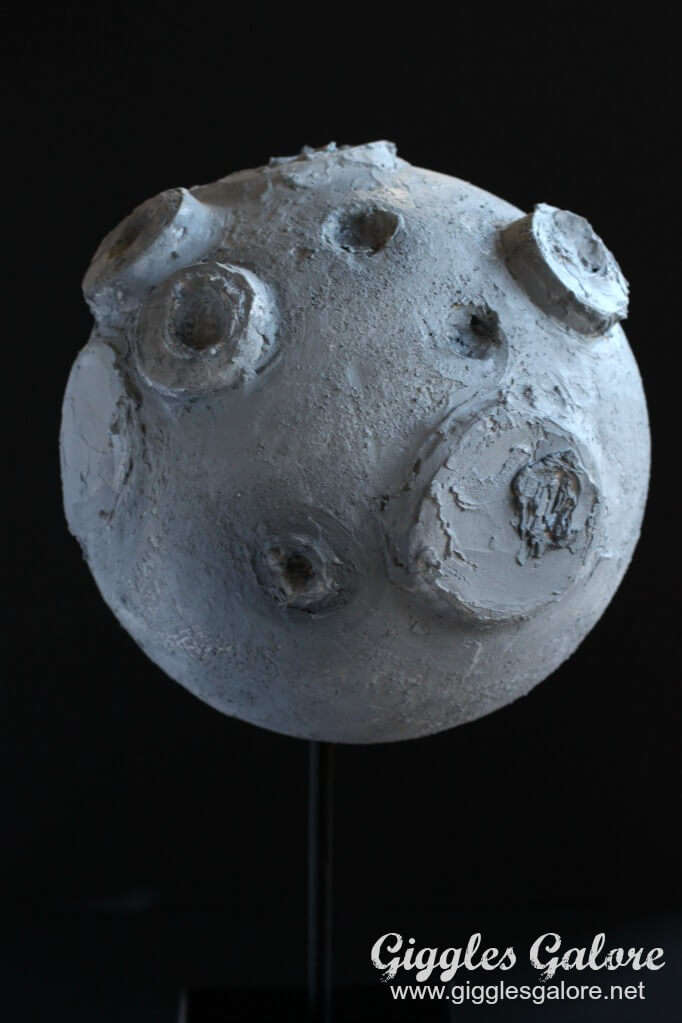
Image Source/Tutorial: Giggles Galore
Materials Required:
- 10″ Foam Ball
- Disposable Cups And Bowl
- Smooth Finish
- Styro Glue Or Low-Temp Hot Glue Gun
- White, Silver, And Gray Craft Paint
- Paintbrush
What a pretty moon model this is! It’s super simple to put together and won’t take up much of your time at all. This is a genuinely fun activity for kids that they should give a go at home.
Even beginners can make this beautiful moon illusion. For this project, you’ll need to get a Styrofoam ball and then cut the bottom sections from any cup and bowl.
After that, glue them on and give the Styrofoam ball a smooth finish. Let it dry completely and then paint it grey. Once that’s dry, attach it to a stand. Your creation is ready to go! This works great for any science project.
3. Easy Animal Cell Model
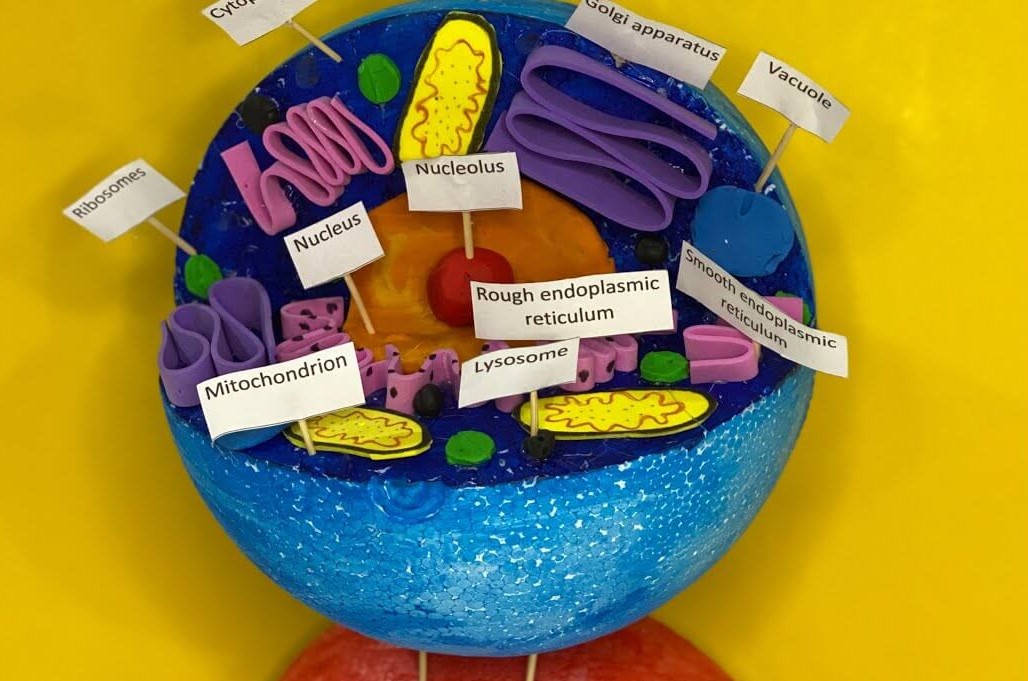
Image Source/Tutorial: 2-Minute Science
Materials Required:
- Styrofoam Ball
- Marker
- Toothpick
- Craft Papers
- Sketchy Colors
- Clay
- Acrylic Paint
- Paintbrush
- Ruler
- Pencil
- Scissor
- Glue Stick
- Glue Gun
Here’s an amazing science project idea for the kids: an animal cell model. Children can present this at any science fair, and it’s a great activity for kids over 10.
There is nothing hard about this craft. To start this budget-friendly project, begin by cutting a large Styrofoam ball down the middle, just like in the picture. Paint it blue and let it dry.
Next, use clay to form the center part. You’ll create the other components with paper strips and clay, following the guidance in the image.
The final touch is adding tags to label the cell parts. Now your project is completely ready to be presented at school! Give it a try.
4. Fizzing Planet Solar System Craft
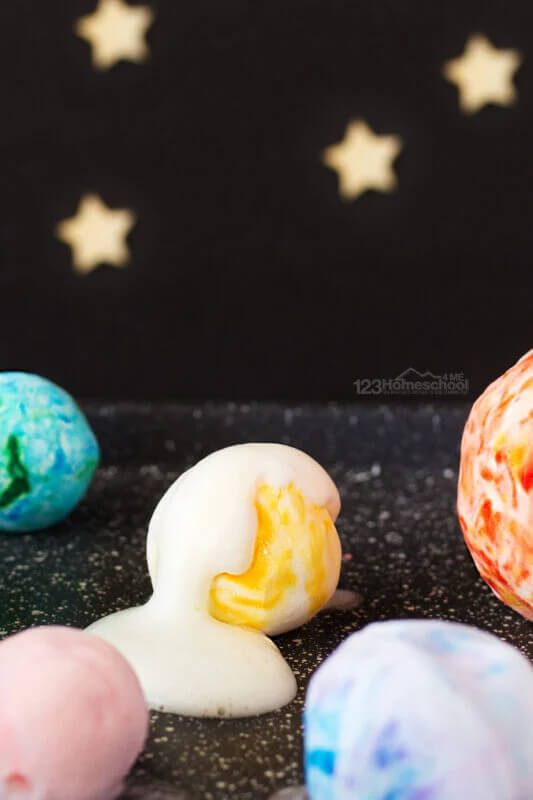
Image Source/Tutorial: 123 Home School 4 Me
Materials Required:
- Baking Soda
- Water
- Dish Soap
- Vinegar
- Food Coloring
- Toothpicks And Orange Pipe Cleaner
This is such a cool science activity for kids. Little ones will be so happy with this experiment! To get started, you’ll take baking soda, water, and soap.
Mix everything together really well and form small balls. After that, add color to the balls. Now the magic happens! Put 2 or 3 drops on the ball and watch it turn into foam.
It’s guaranteed to bring a smile to your kids’ faces. The best part is that you don’t need much time to create this. Parents can easily do this with their tiny ones. It’s a great project to show off at a science fair exhibition.
5. Simple Eyeball Model Project
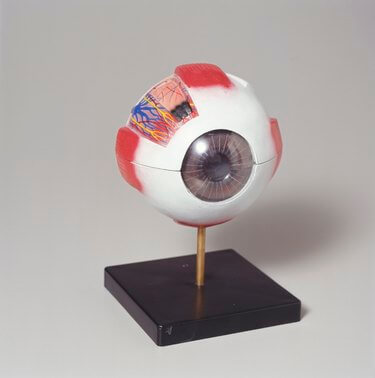
Image Source/Tutorial: EHow
Materials Required:
- White Ping Pong Ball
- Black And Dark Blue Markers
- Pencil
- 6-Inch Wide Styrofoam Ball
- Knife
- Fine Artist Paintbrush
- Red Acrylic Paint
Here is a neat eye-model concept for kids. First, take a white ping pong ball and draw a pupil and iris on it. After that, get a big Styrofoam ball and, using a sharp knife, carve out a circle that’s about one inch deep.
Now, just pop the ping pong ball into that spot and decorate it like you see in the picture. You can fix it to a stand to show it off at any project exhibition.
It could even be used at an eye donation camp as a model of an eye. This activity is perfect for kids around 10 and older.
6. Inner Earth Layers Display Model
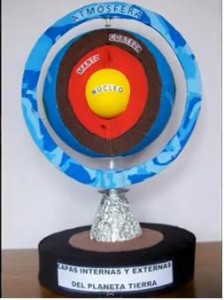
Image Source/Tutorial: Noticiasusodidactico
Materials Required:
- Styrofoam Ball
- Acrylic Paint
- Paintbrush
- Pen
- Scissor
- Glue
- Stand Accessories (optional)
This is a beautiful way to show the inner layers of the Earth. This project is great for helping kids learn more about our planet, and the materials for it are not very expensive.
To make this, grab a Styrofoam ball and cut out a quarter of it from the middle. Then, draw some lines to separate the different layers and paint them red and black.
Next, take a small ball, paint it yellow, and place it in the center to be the Earth’s nucleus. Paint the rest of the ball blue and then set the whole thing on a stand for display. Kids over 10 can create this science project.
7. Simple Earth Model For Kids
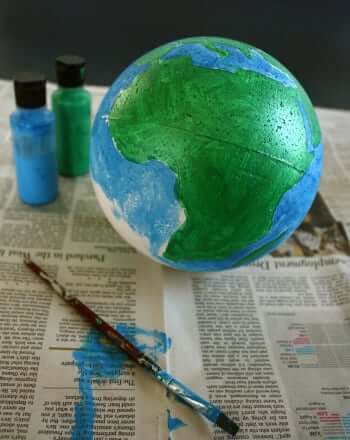
Image Source/Tutorial: Education
Materials Required:
- Styrofoam Ball
- Newspaper Sheets
- Tape
- Large Styrofoam Ball
- Paint (Black, Blue, And Green)
- Paintbrush
Wow! This is a super simple and beautiful globe project for kids. Kindergartners can totally do this, either as a craft or a science project.
To get started, first grab a foam ball and draw a map on it. Now, take your beautiful paint colors and use blue, green, and white. These will represent the ocean and water, the landmasses with forests, and the uncultivable land.
Let it dry, and your pretty globe is ready to show off. This craft is also easy on the wallet, which is perfect for making kids happy.
8. Learning Moon Phases With A Styrofoam Activity
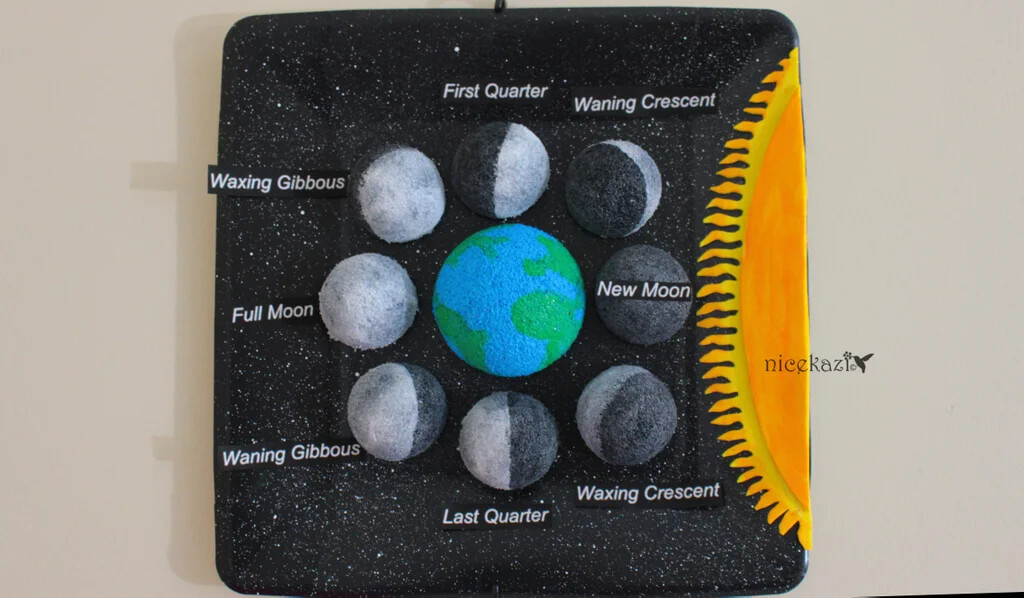
Image Source/Tutorial: Instructables
Materials Required:
- Square Black Paper Plate
- Styrofoam Balls
- Yellow Foam Sheet
- Acrylic Paint
- Paintbrush
- Hot Glue
This picture shows both the orbit and the rotation of the Moon, which helps kids understand how it becomes a full moon. To create this amazing project, take a paper plate and give it some texture with a brush and white paint.
Now, grab some small foam balls and color them half black and half grey. Cut a bigger one and make it look like a globe. Place all the balls just as you see in the picture.
Next, take a yellow foam sheet, cut it out to look like the sun, and paste it on one side. Your science craft is all set!
This makes a great science project for kids over 10, and it won’t take much time or money.
9. Simple Styrofoam Building Project

Image Source/Tutorial: Fantastic Fun Learning
Materials Required:
- Styrofoam Balls
- Low Temp Hot Glue
- Glue Gun
- Acrylic Paint
- Paintbrush
This is a wonderful idea for representing buildings with Styrofoam. You can use it in any project where you want to create the illusion of buildings.
Kids around 10 years old can make this beautiful piece for their projects. To create this, they just need to get some small foam balls and make them colorful.
After that, they’ll take a flat, circular foam base and glue all the small balls on top of each other in a random pattern. And just like that, the building craft is ready! This can be used in any science exhibition.
10. A Moon Phases Science Experiment
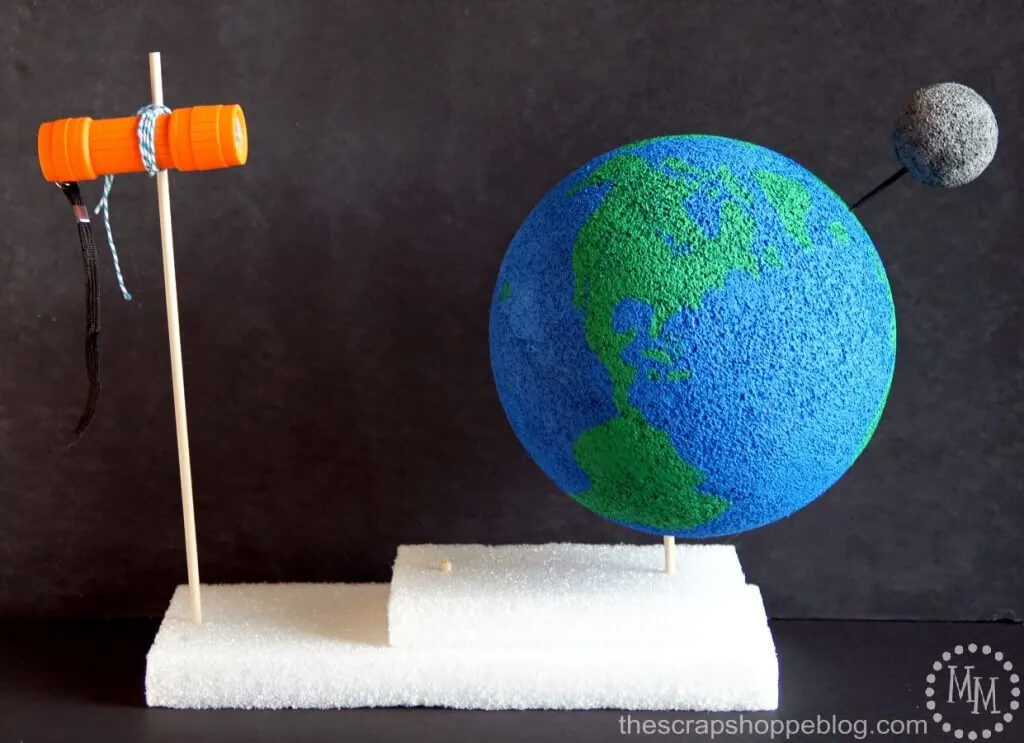
Image Source/Tutorial: The Scrap Shoppe Blog
Materials Required:
- Toothpick
- 2 Small Dowel Rods (1/4″ Diameter)
- Small Flashlight
- Twine
- Foam Sheet
- 8″ Foam Ball
- 2″ Foam Ball
- Acrylic Paint (Blue, Green, Light Gray, Dark Gray, And Black)
This is a really cool moon phases science experiment project idea for kids. To get started, begin by painting a Styrofoam ball blue, green, and white to give it the illusion of the Earth.
Now, add a small ball to it, which will symbolize the moon. Next, take another stick and fix it into the Earth model with a flat foam base. For a better view, set up a light just as shown in the picture.
You can enjoy your great piece of work! It’s perfect to show at any science fair exhibition. This is a budget-friendly craft that’s great for kids over 10. They’ll have a lot of fun with it.
11. Earth Cores Model Project
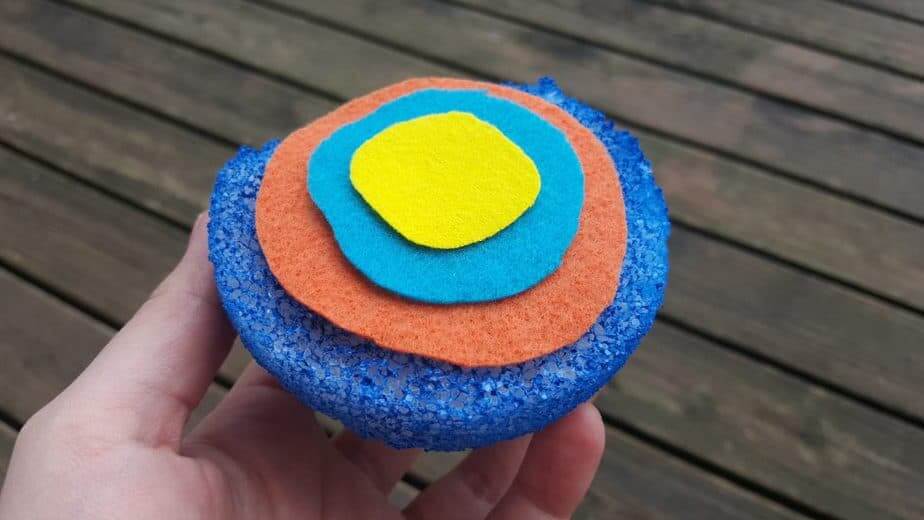
Image Source/Tutorial: Surviving A Teacher’s Salary
Materials Required:
- 1 Craft Foam Ball
- Blue Spray Paint
- 3 Different Colors Of Felt
- Scissors
- Large Knife
This beautiful Earth core model is so easy for kids to make! This craft activity is great for children under 10 and isn’t a costly project.
To make it, first cut a Styrofoam ball in half and color it blue using spray paint. After that, take three different sizes of felt. Next, you will paste the felts in order from largest to smallest.
These felt layers represent the inner core, outer core, mantle, and crust. Let it dry, and your beautiful Earth core model is ready to use. This makes a great science project, and kids over 10 can also use this in their own projects.
12. DIY Faux Geode Craft
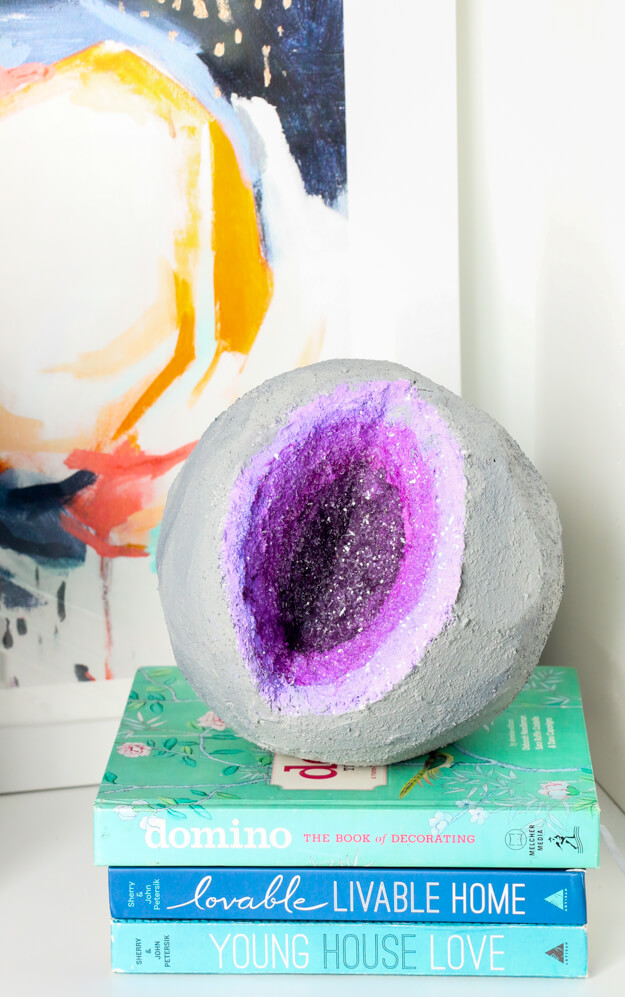
Image Source/Tutorial: A Kailo Chic Life
Materials Required:
- 8″ Foam Ball
- Smooth Finish
- Foam Knife
- Diamond Dust
- StyroGlue
- Several Shades of Purple Acrylic Paint
- Paint Brush
- Faux concrete paint by Folk Art
- Spatula
This project is a beautiful representation of Earth’s layers and is so much fun to create. The material cost is also economical. To make this, take a Styrofoam ball and cut a quarter of it from the middle.
Next, apply a smooth finish over the whole foam ball and let it dry. Then, take different shades of purple paint and apply them in the center, just like in the picture.
To give it a charming look, sprinkle diamond dust on it. This science project is great for kids over 10. You can also use it as a part of any bigger science project.
13. Simple 3-D Animal Cell Model Craft
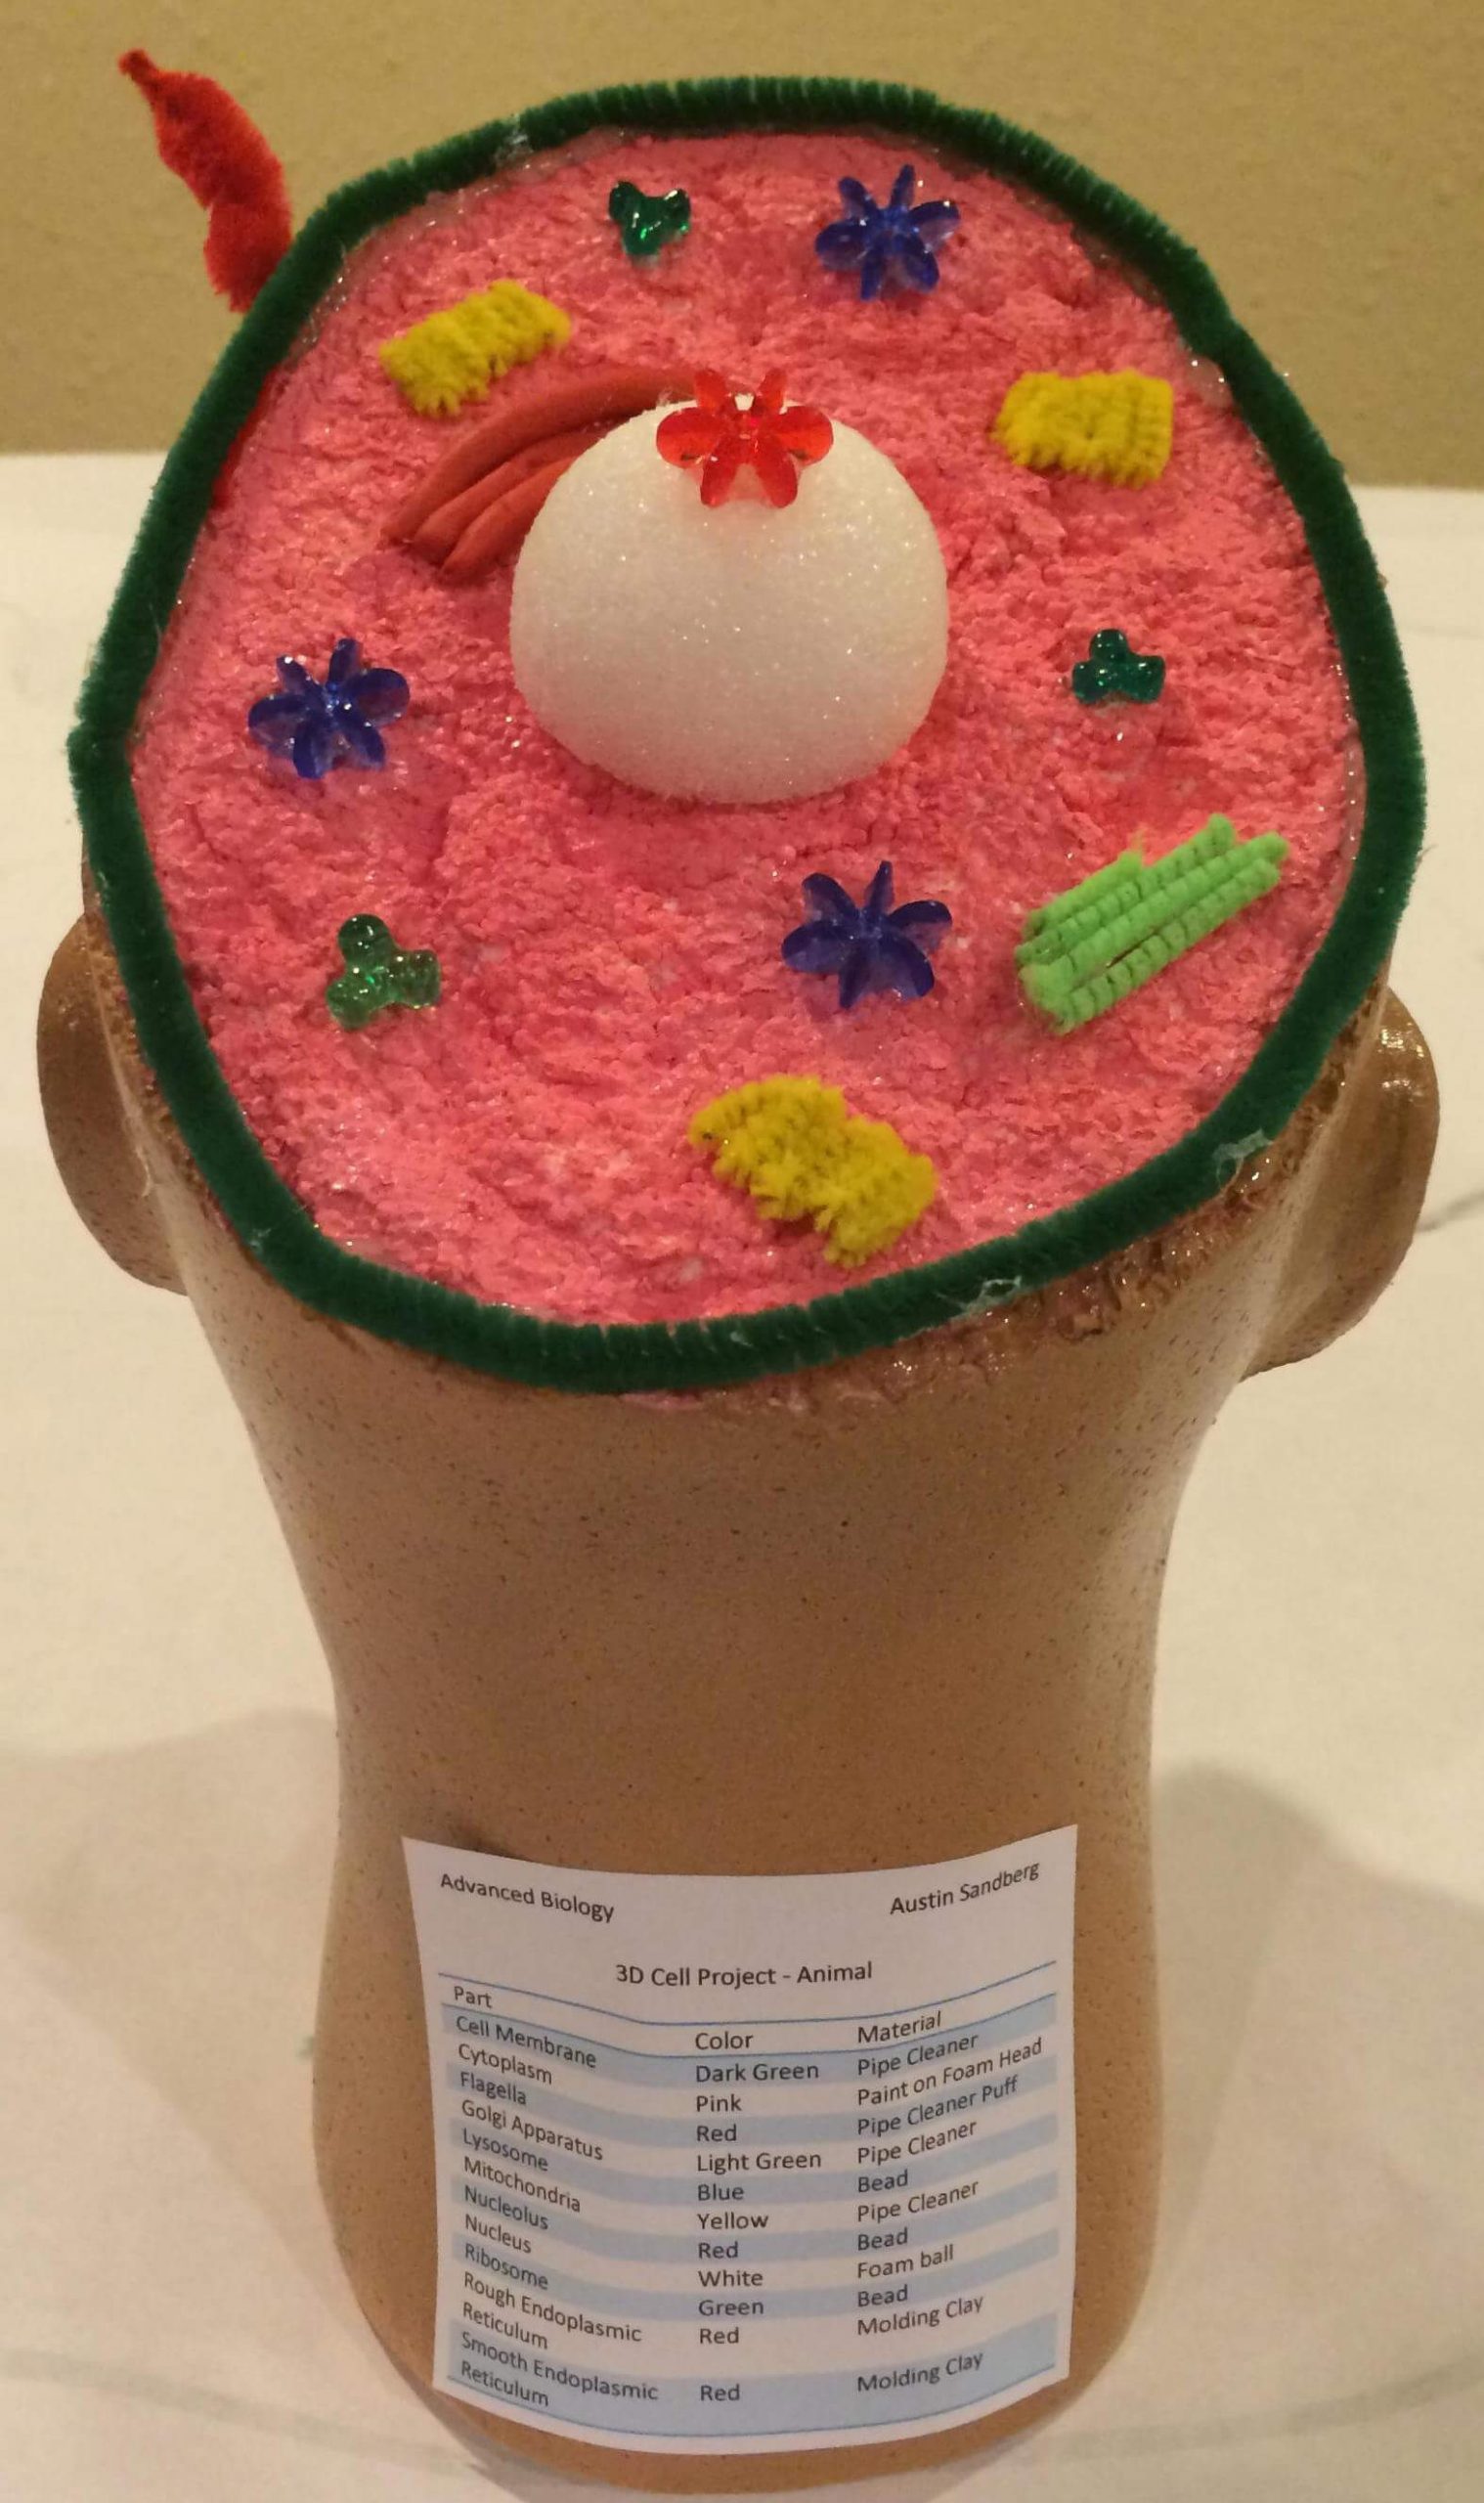
This is a craft model of an animal cell, and there’s nothing difficult about it. To make this economical project, start by cutting a large Styrofoam ball from the middle as shown above.
Paint it pink and let it dry. Now, make its center with a smaller foam ball. Create the other parts using beads as guided by the picture. Your project is all finished! You can present it at school.
Give it a try at home. Kids can show this at any science fair exhibition, and it’s a fun craft activity for kids over 10.
14. Fun Saturn Model Craft
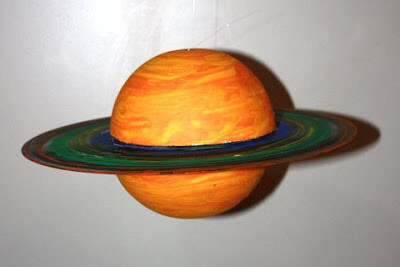
Image Source/Tutorial: Jean In All Honesty
Materials Required:
- 3″ Styrofoam Ball
- CD Or DVD
- Spray Adhesive
- Hot Glue Gun Or Any Thick Adhesive
- Acrylic Paint
- Paintbrush
This is a super easy Saturn model craft idea for kids, which they can make as a science project. Kindergartners can handle this activity without any trouble. This craft is so simple to make.
To create it, take a CD or DVD. Now, create rings on it. Next, grab a foam ball and color it. Cut the ball in half and glue it on both sides of the CD. Let it dry completely.
To hang it, add a screw to the top. Your craft is ready to use! You can decorate your science lab by hanging this up. You should try it at home; it will be a blast for the kids.
15. An Easy Earth Model Science Project
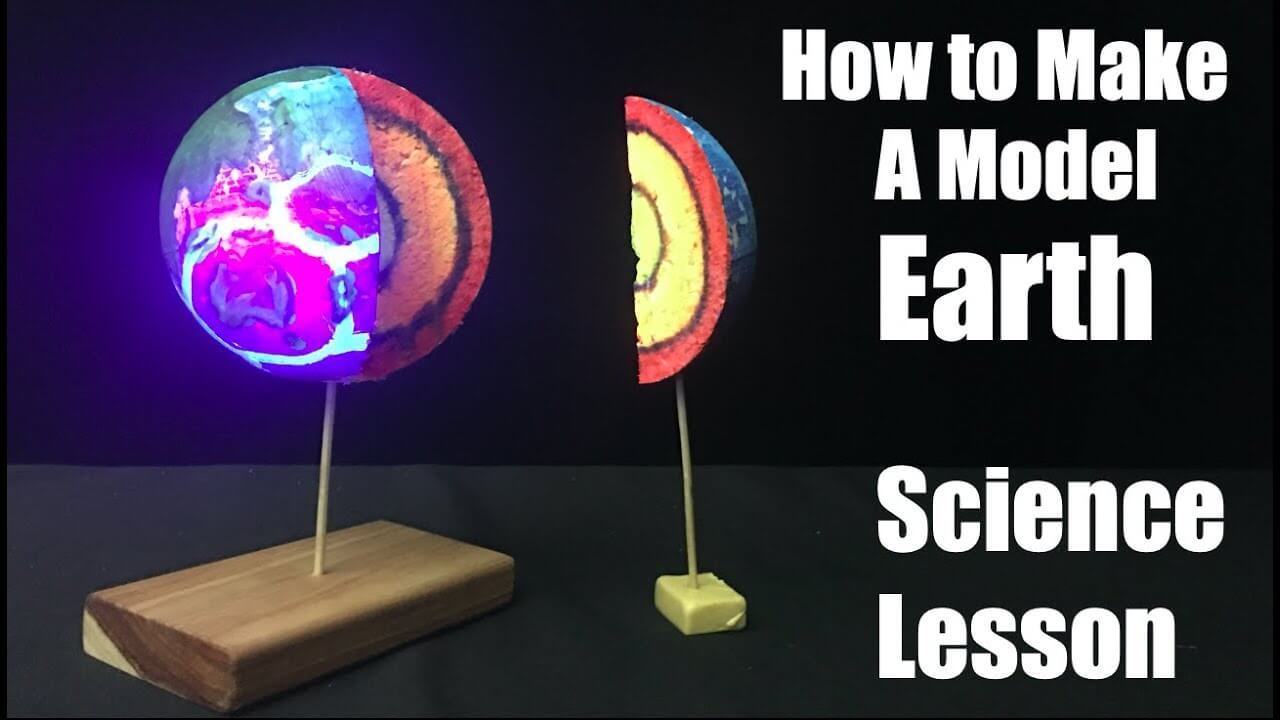
Image Source/Tutorial: Science For Kids
Materials Required:
- Acrylic Paint
- Paintbrush
- Foam Ball
- Styro Cutter
- Smooth Finish
- Paint Brushes
- Wood Piece
- Toothpick
Here’s a beautiful model showing the layers of the Earth. This craft is a great way to help kids learn about the Earth’s coating, and the materials are not too costly.
To make it, take a foam ball and cut off a quarter section, setting it aside. Now, draw some lines to divide the main ball into different layers and paint them red for the crust, orange for the mantle, and yellow for the core.
Next, take a piece of wood and a stick to create a stand. Paint the rest of the ball area with colors and place the whole craft on the stand to display it.
Do the same with the quarter piece you set aside, just like in the picture. This is a great science project for kids over 10 to create.
16. Lunar Phases Learning Activity
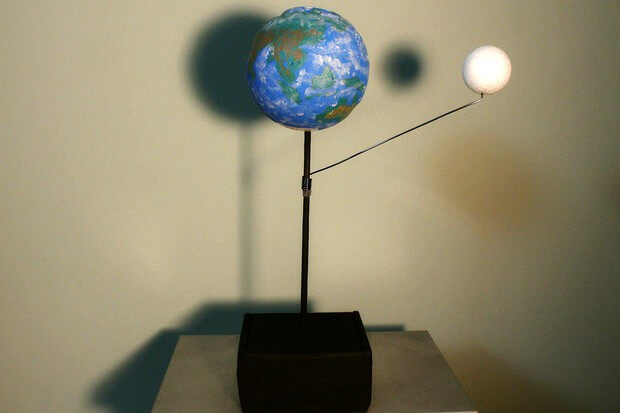
Image Source/Tutorial: Sky At Night Magazine
Materials Required:
- A Wooden Barbecue Skewer
- 7.5cm White Polystyrene Ball
- 2.5cm White Polystyrene Ball
- A Small Elastic Band
- A Small But Sturdy Box To Act As A Base
- An Angle-Poise Lamp With A Bendable Head
- Acrylic Paint
- Paintbrush
This is a model showing an eclipse of the Earth and Moon. You can display it at any science fair exhibition. This project is a fun activity for kids over 10. It’s also a budget-friendly craft.
To create it, start by painting a wooden stick black. After that, take a Styrofoam ball and paint it to look like the Earth. To create an arm for the Moon, tightly wind one end of a wire around the skewer.
Now, add a small ball on it to represent the Moon. Enjoy your awesome piece of work!
17. Easy Earth Model Project
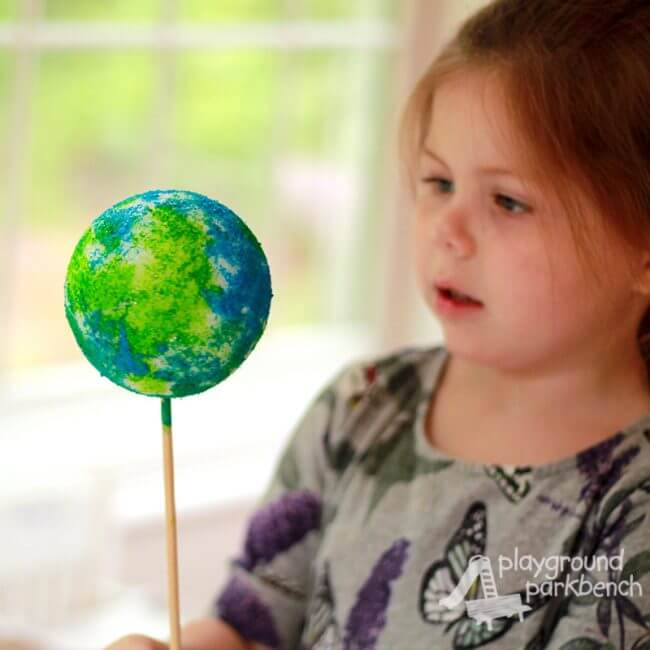
Image Source/Tutorial: Playground Park Bench
Materials Required:
- Large Styrofoam Ball
- Acrylic Color ( Blue And Green )
- Gold Star
- Push Pin Or Marker
- Foam Brush
- Wooden Craft Dowel
- Flash Light
This is a very simple Earth representation for kids. Kindergartners can do this as either a craft or a science project.
To make it, first take a Styrofoam ball and draw an idea of the map on it. Now, take your beautiful paint colors and paint it blue, green, and white.
These colors represent the ocean and water, landmasses including forests, and uncultivable land. Let it dry, and your pretty globe is ready to demonstrate.
You can add a stick to it for holding. This craft is economical and sure to make kids happy. You should try this one at home.
18. An Easy Cell Model Project Idea
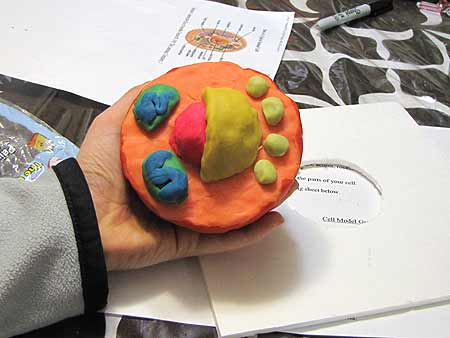
Image Source/Tutorial: Woo Jr.
Materials Required:
- 6″ Styrofoam Ball
- 1 1/2″ Styrofoam Ball
- Playdough
- 10″ Square Piece Of Foam Core Board
- Paper Scraps
- Toothpicks
- Small Piece Of Plastic Or Saran Wrap (About 3 Inches Square)
- Pen Or Marker
- Clear Tape
Here is an easy and beautiful science project idea for kids. It’s a model of an animal cell that kids can present at any science fair. This craft activity is great for children under 10, and it isn’t hard to do.
To make this economical project, start by cutting a large Styrofoam ball in half as shown. Take some orange dough and cover the base with it.
After that, create all the cells and other parts with different colors of clay. Your project is now ready! You can present it at school. Definitely give it a try at home.
19. Earth Globe Craft For Kids
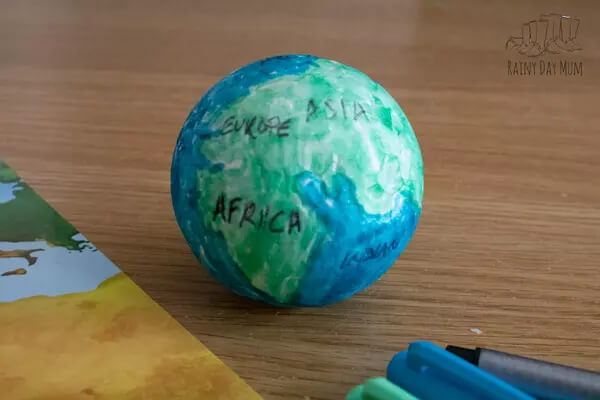
Image Source/Tutorial: Rainy Day Mum
Materials Required:
- 3″ Styrofoam Ball
- Sharpie Green And Blue
- Black Marker
This is an easy globe craft for kids. Children under 6 can do this as a craft or a science project, and it helps them get to know the continents of the world.
This craft is budget-friendly and will make kids happy. There’s nothing hard about it. To make it, first grab a foam ball and draw the map on it with a pencil.
Now, take your pretty paint colors and paint it blue, green, and white. Let it dry. Next, write the names of the continents with a marker, and your pretty Earth globe craft is ready to show.
20. Fantastic Human Eyeball Model
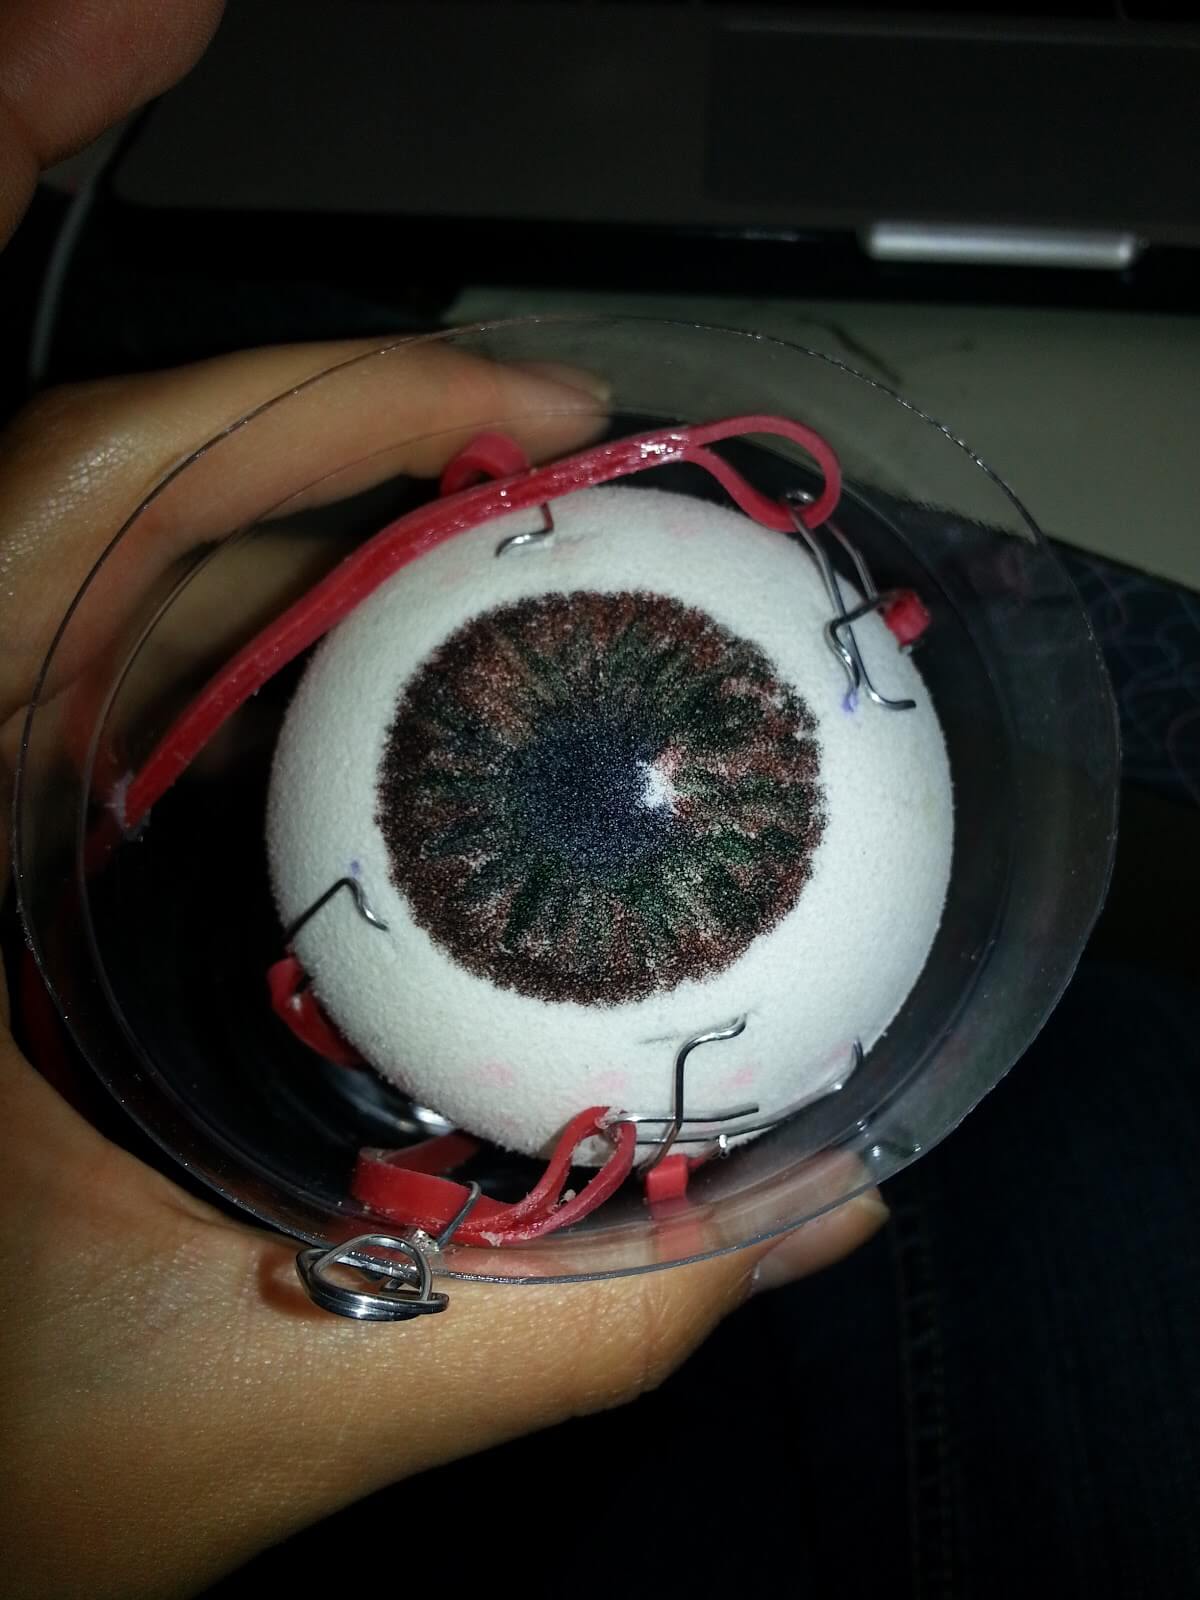
Image Source/Tutorial: Discordia
Materials Required:
- Foam Ball
- Pencil
- 3 Colored Markers (Your Choice)
This is a beautiful eyeball model for kids to make. To create it, take a big Styrofoam ball and use pencils and markers to draw a pupil and iris on it.
Now, place it inside a plastic glass object and decorate it as shown in the picture. Fix it to a stand and show it off at any project exhibition.
You can also use it in eye treatment camps as a representation of an eye. Kids around 10 and older can do this activity, and it won’t take much time to make them happy.
21. Easy Earth Core Learning Activity
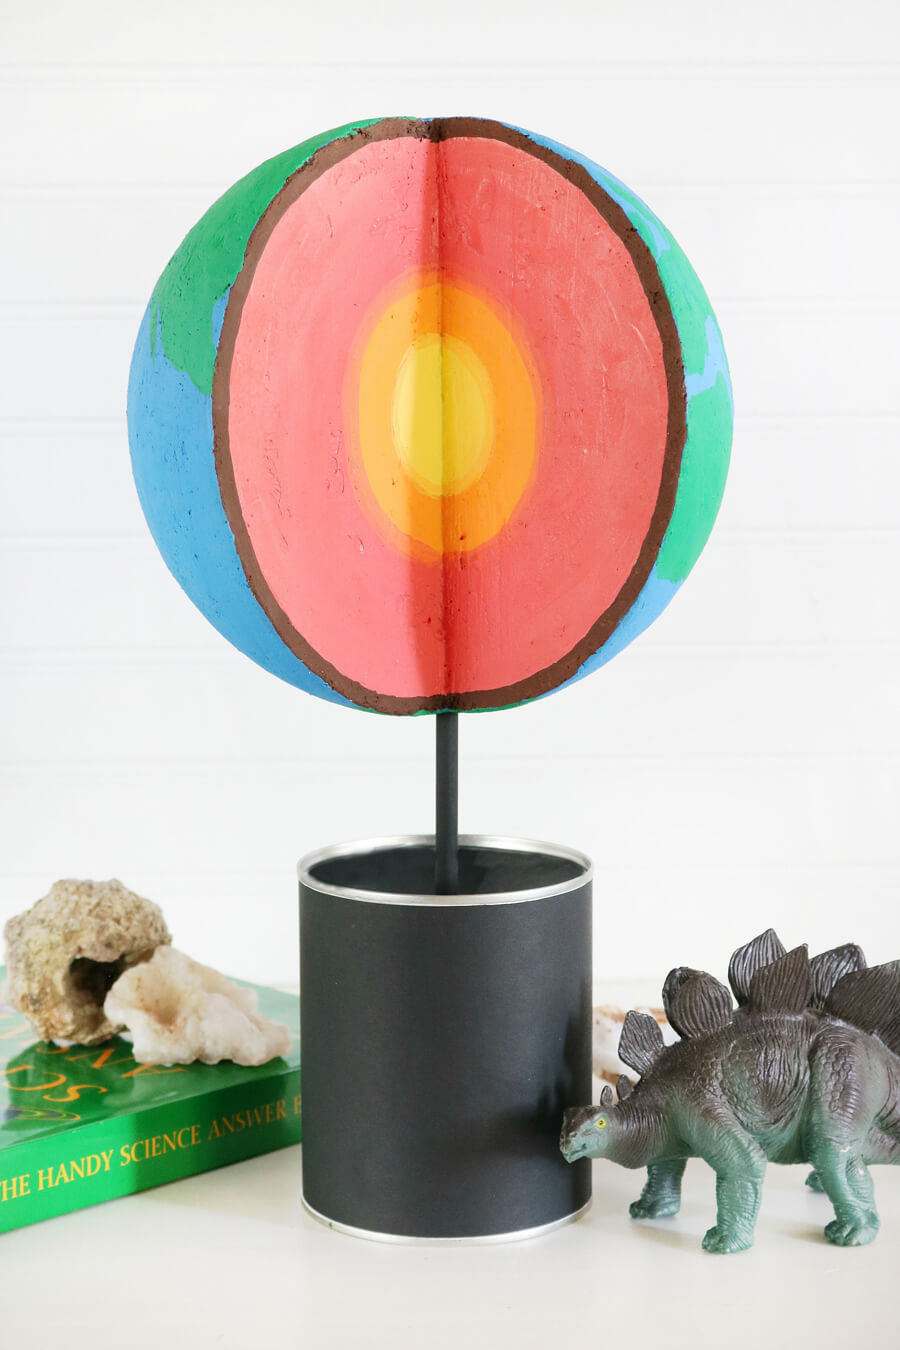
Image Source/Tutorial: The Crafted Sparrow
Materials Required:
- Acrylic Paint
- 8″ Foam Ball
- Styro Cutter
- Smooth Finish
- Paint Brushes
- Wood Dowel
- Sandpaper
Here is a beautiful representation of the layers of the Earth. This craft is a great way for kids to learn about the Earth’s coating, and the material cost is not very high.
To make it, take a Styrofoam ball and cut a quarter of it from the middle. Now, draw some lines to divide it into different layers and paint them brown as the crust, coral as the mantle, orange as the outer core, and yellow as the inner layer.
Next, get a can and a stick to make a stand. Paint the rest of the ball blue and green, and place the whole craft on the stand to display it. Kids over 10 can create this science project.