
Unlike many other guides, this one focuses on making something truly functional, not just a decorative craft. You’ll be able to use this finished item in practical ways. Gather your supplies, which simply means one sheet of paper, and let’s start creating this origami.
What You’ll Need
This tutorial uses a floral print wrapping paper.
The Process
Step 1: Preparing Your Sheet with Fold Marks
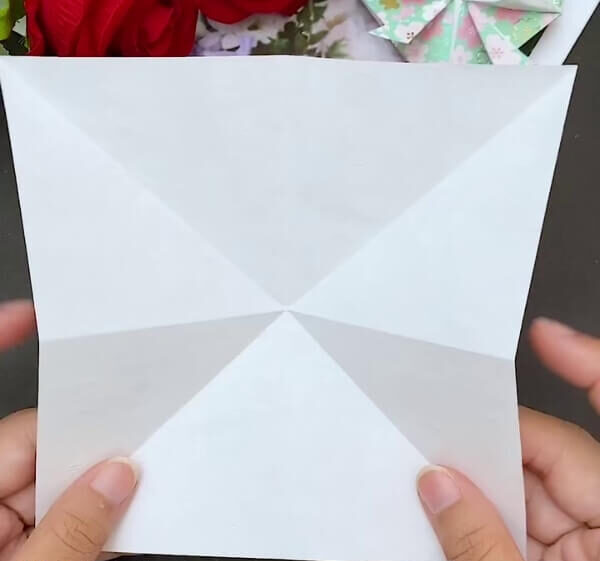
Lay your wrapping sheet on a flat surface with the white, inner side facing upwards. Fold one corner to meet its opposite, forming a diagonal crease. Do this again for the other two opposing corners.
Next, flip the paper to its floral side and create a fold directly down the middle. The image below displays these important fold lines for clarity.
Step 2: Joining the Triangle Markings
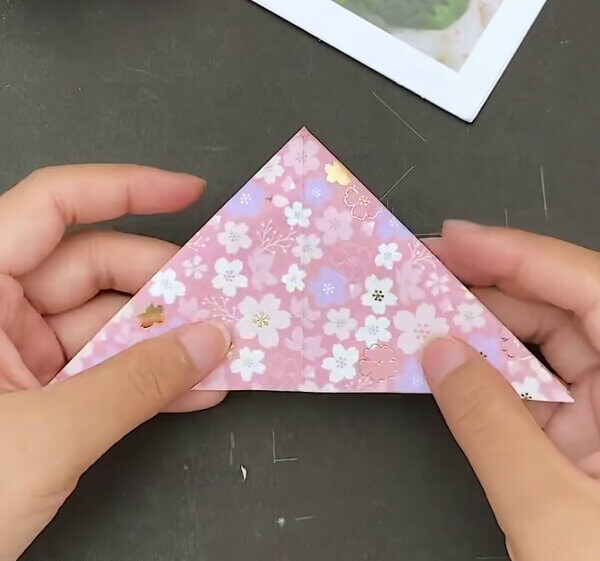
Following the earlier triangle folds on the sides, now create a new fold on the sheet. Position your index fingers on these triangle corners, gently pushing them inward until they align perfectly along the baseline, side by side. Then, smooth down the paper that rests above these new folds.
Your sheet should now clearly form a triangle, just as depicted in the image.
Step 3: Folding the Triangle’s Peak
Fold the triangle’s top corner by bringing it all the way down to its base. The image below shows you exactly how this should look.
Step 4: Reversing the Shape
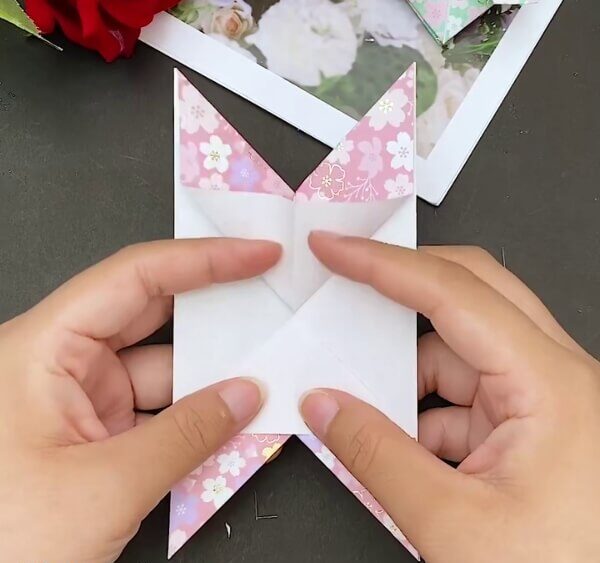
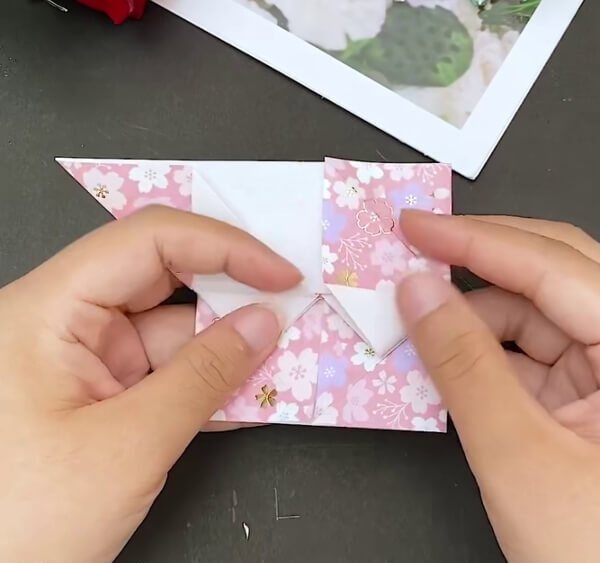
Grasp every corner and gently extend them, which will expose the detailed pattern within. Take the two sections of paper extending from the shape’s center line and fold them into triangles. Refer to the image provided for visual guidance.
Step 5: Adding Further Folds
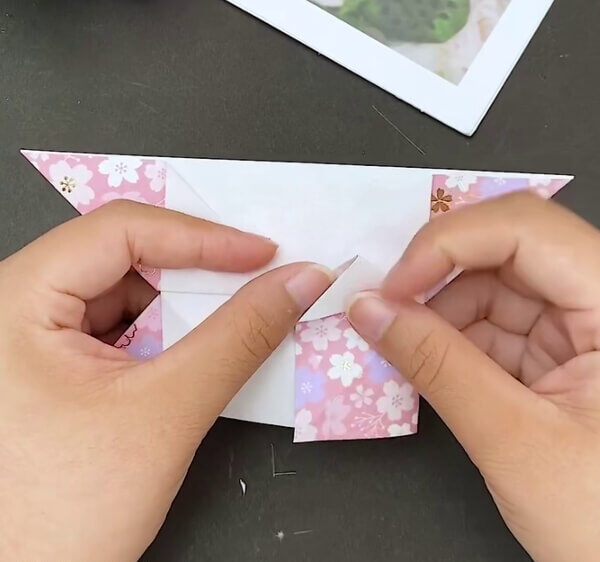
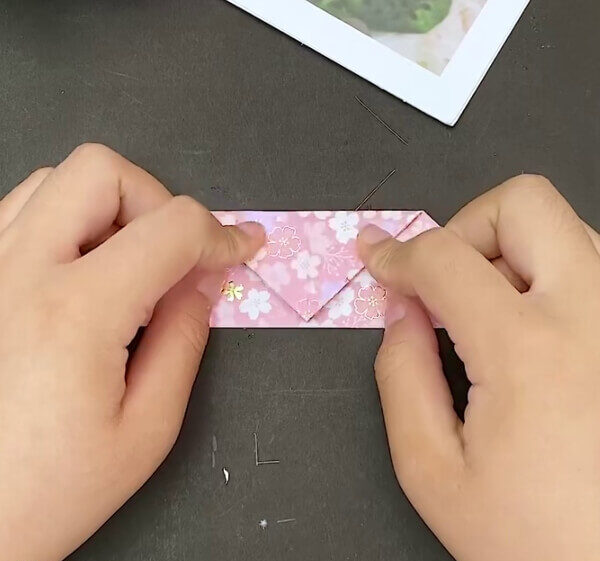
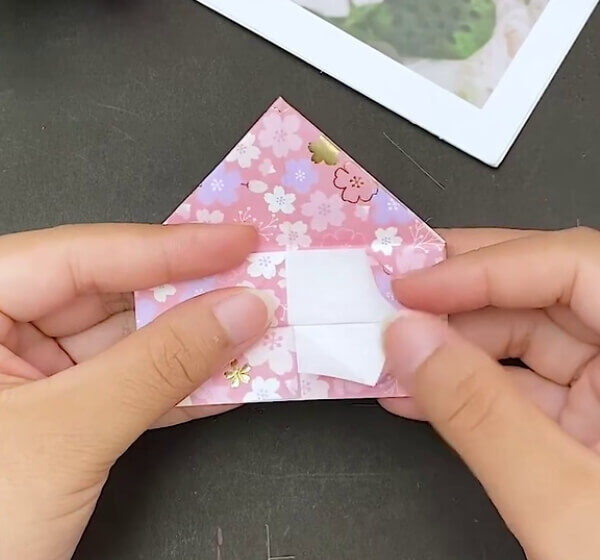
Now take the right corner of the shape’s lower portion. Open the existing fold and then flatten this section of the paper, shaping the opened corner into a square. Consult the image below for assistance.
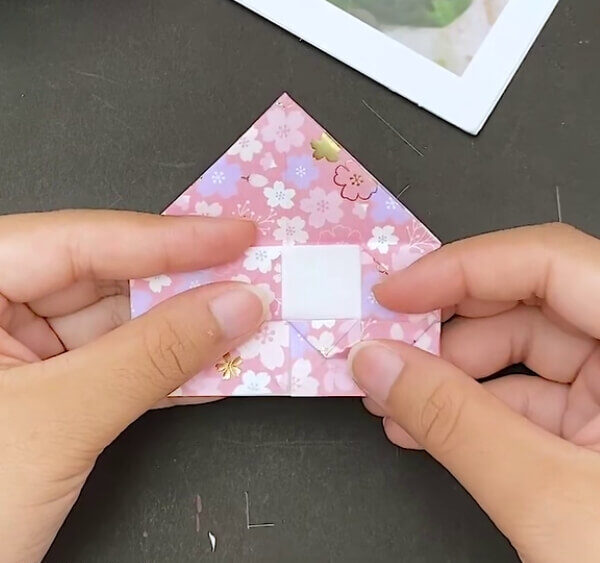
Step 6: Mirroring the Fold on the Opposite Side
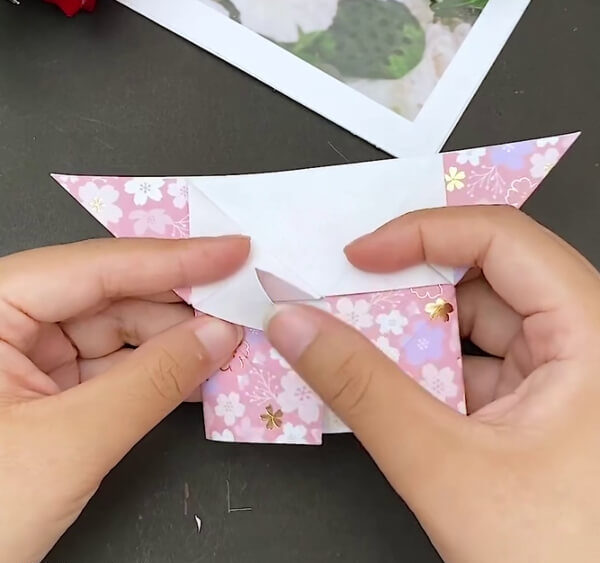
Repeat the exact same process on the remaining corner of this side, creating another square fold that has a triangle at its top, as shown in the picture. This ensures that the folds are neatly aligned, positioned right beside one another.
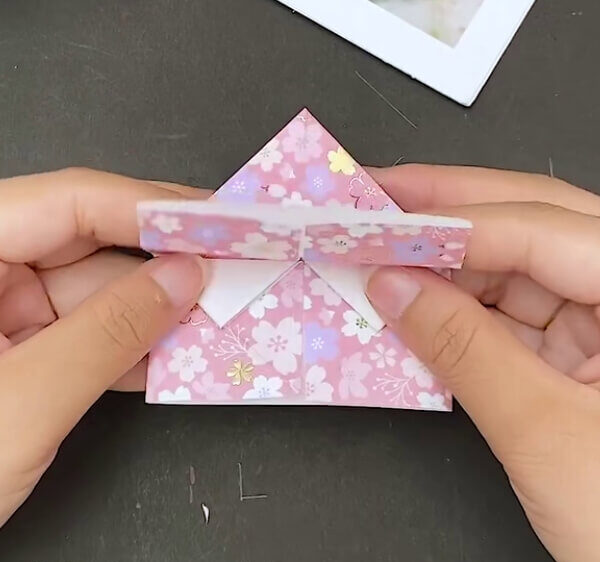
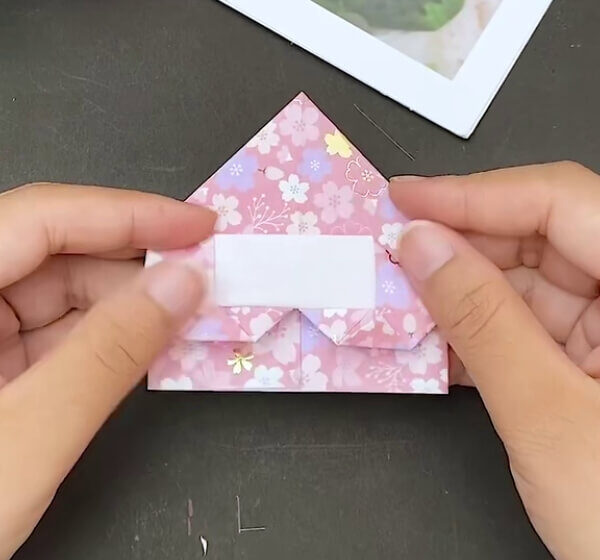
Step 7: Pressing Down the Top Triangle Folds
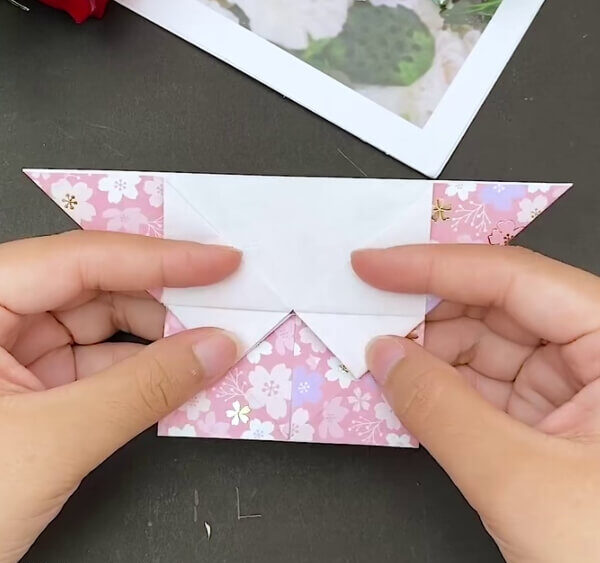
Grab the two triangular folds located above the squares just formed. Pull them backwards to flatten them against the square fold beneath. Firmly press to secure their position. The image below provides a clear example.
Step 8: Folding the Upper Section Too
Also create similar square folds on the shape’s top right corner, as depicted in the picture.
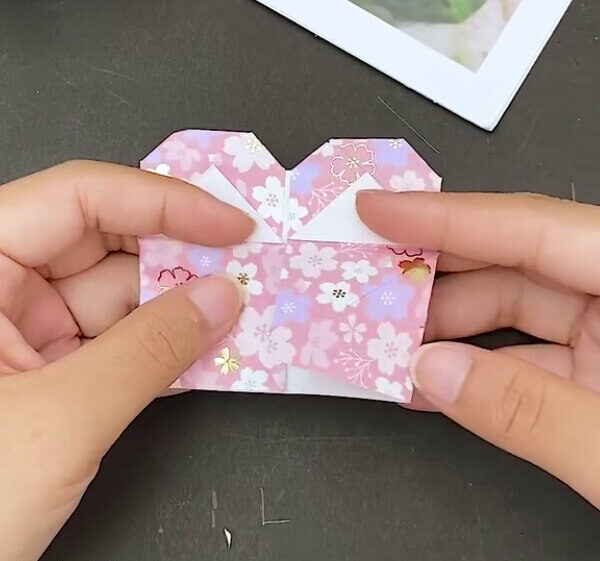
Step 9: Standing Up the Folds
Perform the same action on the shape’s top left corner. Now there are four distinct triangular folds in the center of the sheet. Flatten the two triangles from the top part of the shape over the triangles in the lower section.
To finish, orient the square folds at the top in a vertical position, just as illustrated in the accompanying picture.
Step 10: Folding the Upright Shape
Press the upright sheet back down onto the large triangle fold in the rear.
Next, apply pressure to the edges of the crease mark on the right side of this now flattened sheet. This action will form a small triangular shape at the rightmost edge of this side, as visible in the picture.
Step 11: Forming a Miniature Triangle
Fold the paper situated next to the bottom corner of this triangle fold. Then, create a small crease on that identical bottom corner of the triangle fold from the last step. This will result in a smaller triangle fold appearing beneath the previously formed triangular fold, as displayed in the image.
Step 12: Duplicating the Process on the Other Side
Now, take the side opposite to the one just folded and replicate the last two steps there too. The accompanying picture offers a visual guide.
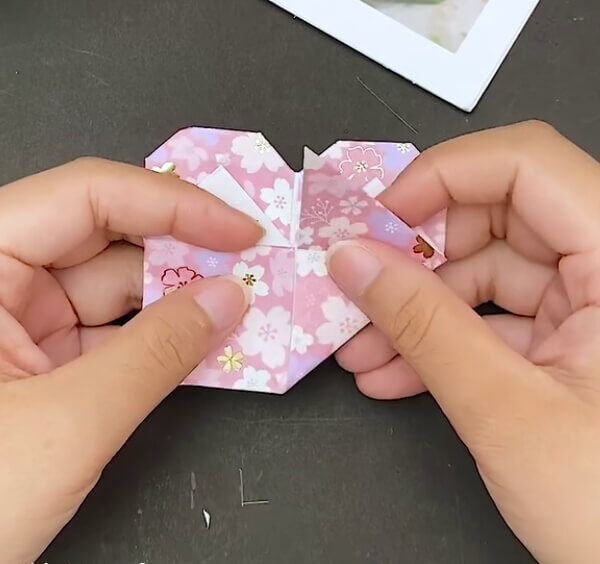
Step 13: Reversing the Folds
Carefully fold the entire structure created over the last three steps, moving it backward. Press it flat on the other side, as the picture demonstrates. Next, flip the central triangles backward too, pressing them flat on this same side. Consult the image for a visual.
Step 14: Folding Back the Lower Section
The two square folds at the bottom are now clearly visible. Fold the square on the right part of this section back along the creases made earlier, as the picture illustrates.
Step 15: Bringing the Two Triangles into Alignment
The bottom right portion now forms a large triangle, featuring a central crease that suggests two smaller triangles. Fold the upper triangle, above this mark, backward onto the triangle below the crease. Finally, fold a small section of the bottom corner of the triangle just created.
This particular fold should be made on the right side of the shape, allowing it to protrude slightly beyond the shape’s edges. The image below offers a helpful reference.
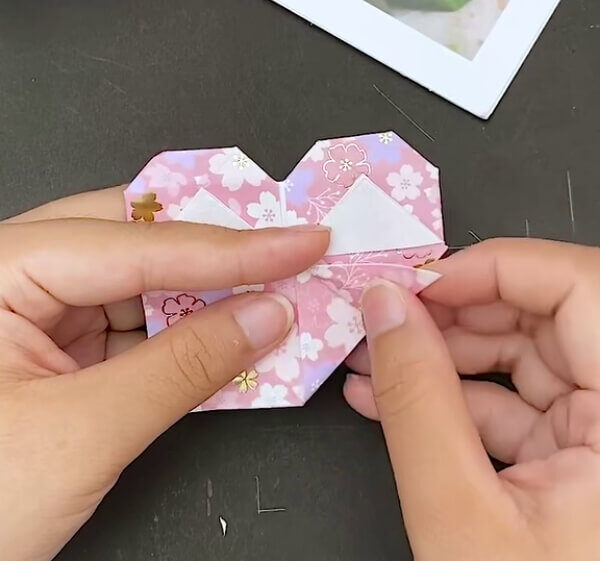
Step 16: Adjusting the Central Triangles
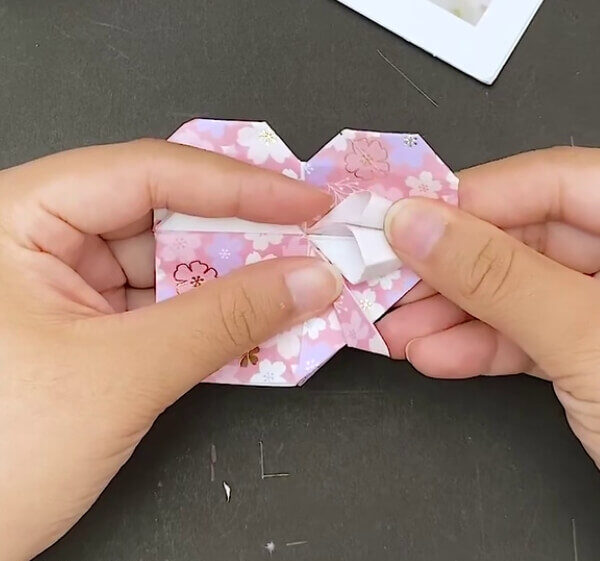
Press firmly on the crease marks found on the right sides of both central triangles. This action will cause the triangles to alter their form, creating open pockets instead. Consult the provided picture for guidance.
Your Craft is Complete!
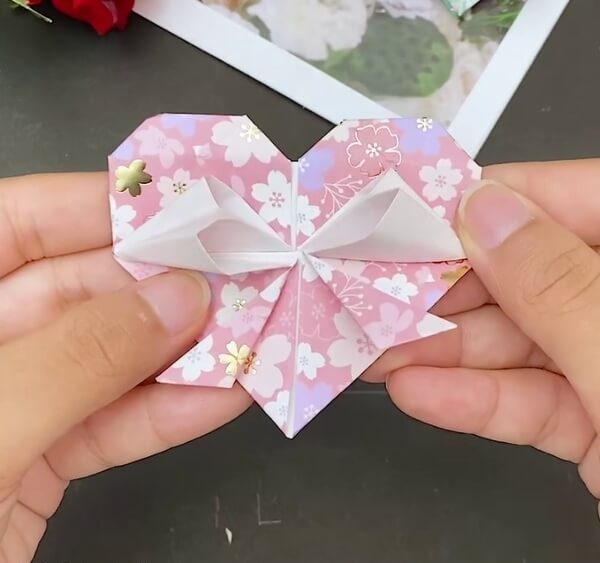
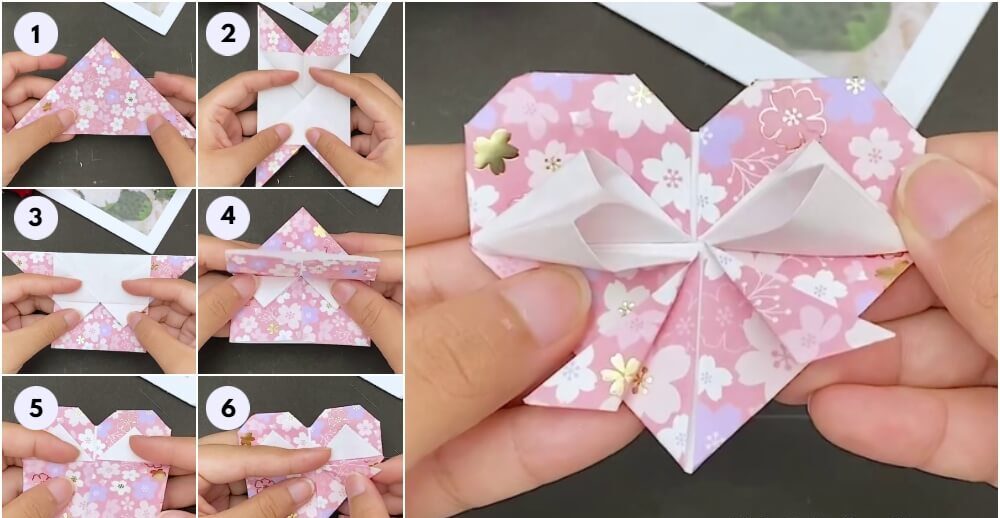
Now, repeat the last three steps on the shape’s other side, as the image below shows. The heart shaped envelope is now finished, featuring a sweet ribbon bow at its center.
This lovely gifting envelope is now ready for use. Feel free to write a special note inside for someone. It’s perfect for enclosing gift cards for various celebrations. This guide has walked you through some detailed folding techniques that will undoubtedly improve your fundamental crafting skills.
This origami project proves especially useful during holiday seasons. Consider other creative concepts to apply these methods and truly master your craft. Best of luck!