
If you enjoy collecting lovely new dresses, then you will adore this project! This activity results in a charming little dress that will capture your attention and everyone else’s! This paper dress is easily made with just one piece of paper, thanks to the magic of origami!
Origami provides a wonderful method to involve children in an enjoyable learning experience, boosting their fine motor skills and imaginative thinking!
This guide provides very simple and precise directions for every stage of making this origami dress! So, why wait any longer? Let’s get started!
Creating an Origami Mini Skirt Dress
What You Will Need
- Flower-print Origami Paper
How to Make It
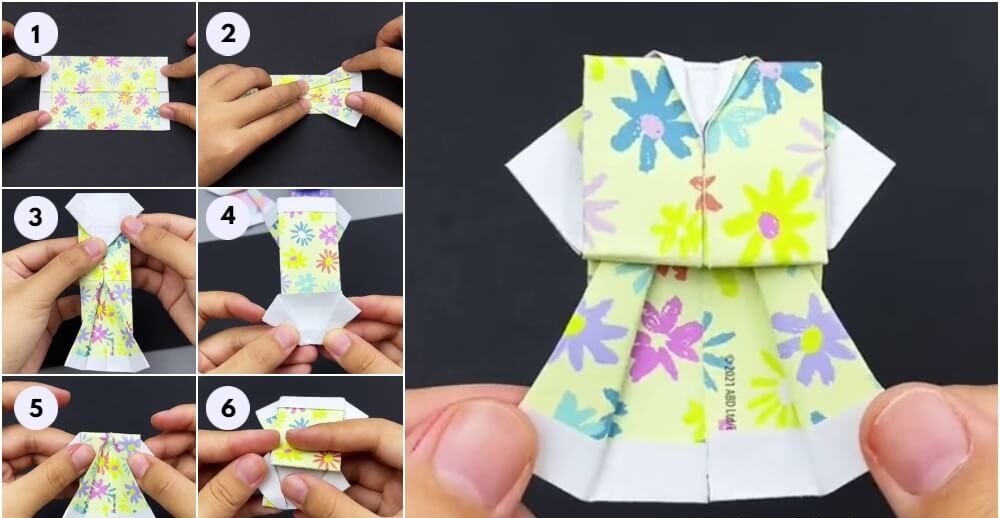
Step 1: Folding One Side of the Paper
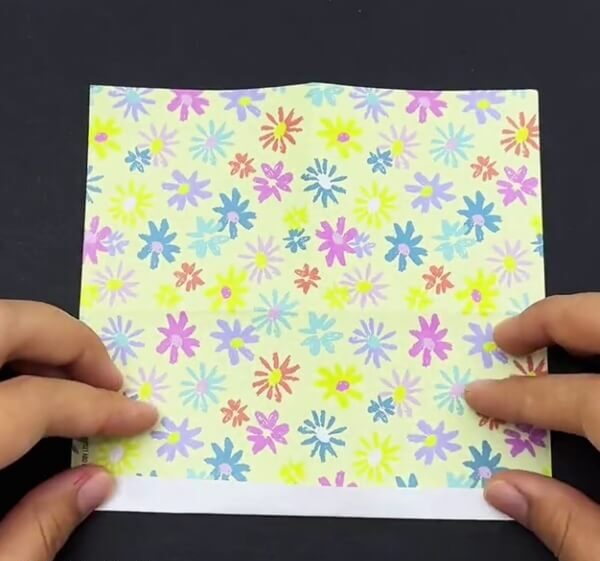
To begin this project, grab a flower print origami sheet that has a plain white side. Next, fold one edge of the paper to reveal a white stripe.
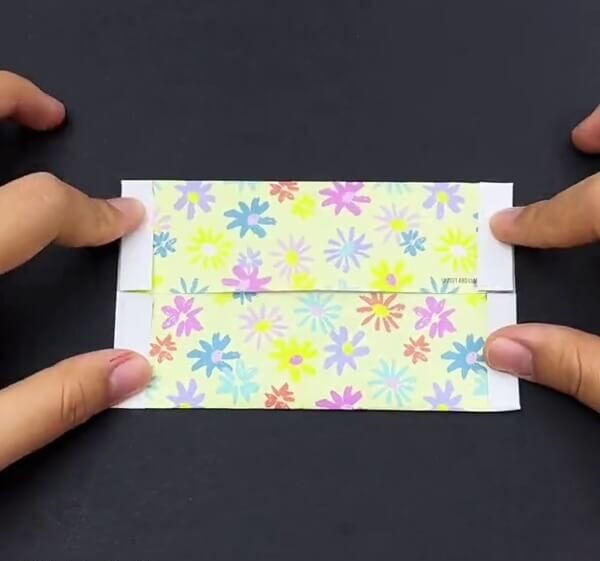
Step 2: Folding the Opposite Side of the Paper
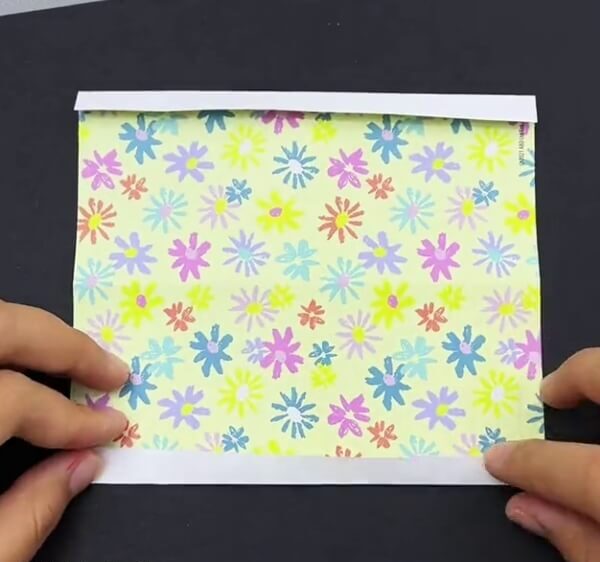
Then, fold the other edge of the paper again, so a white stripe appears on that side too.
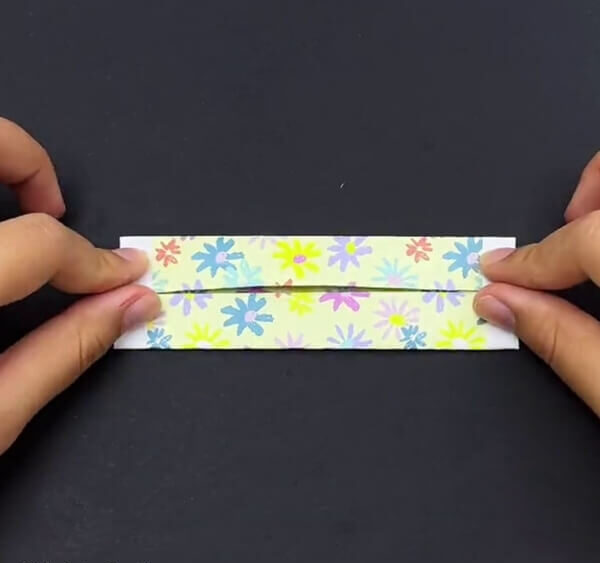
Step 3: Flipping and Folding to the Middle
Flip the paper to its plain white surface and fold the uncreased sides towards the center of the paper, creating a middle division as shown in the picture.
Step 4: Folding Again to the Partition
Once more, fold the edges towards that central partition.
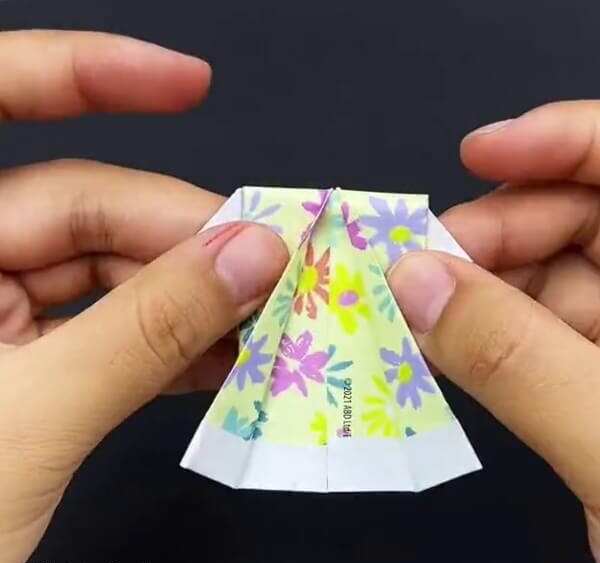
Step 5: Making an Inside Reverse Fold
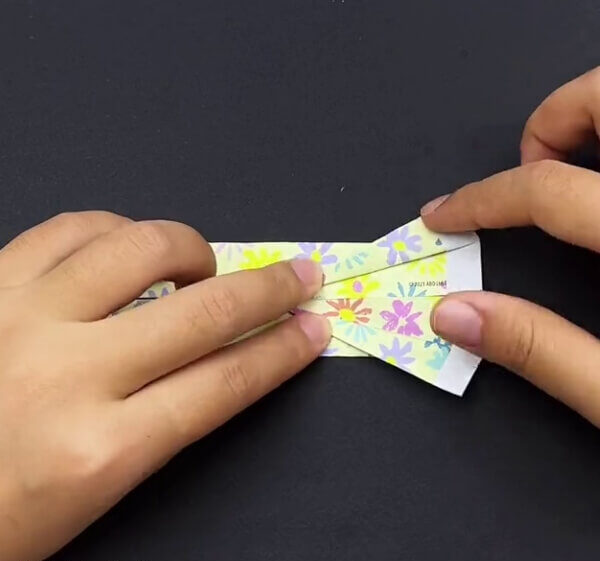
Place a finger in the middle of the partition, and from its right side, open the initial layer of the division to perform an inside reverse fold over it. This part will become the skirt for the dress.
Step 6: Making a Collar
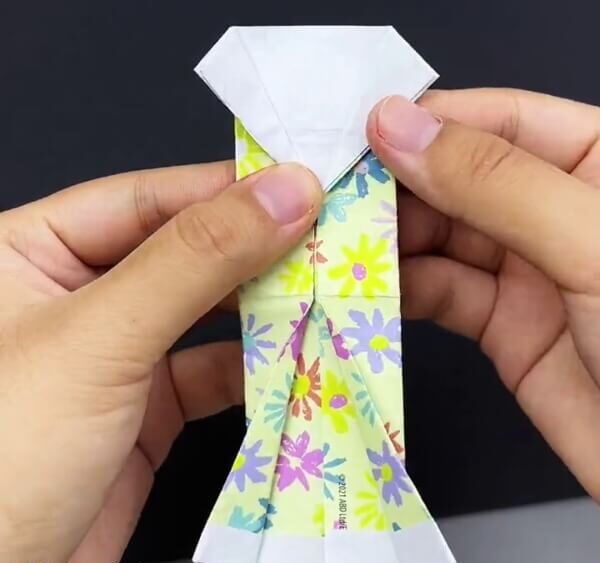
From the opposite end of the skirt, fold the paper again to create another inside reverse fold on that side. However, this time use both layers of the partition, not just the middle section.
Step 7: Folding the Collar
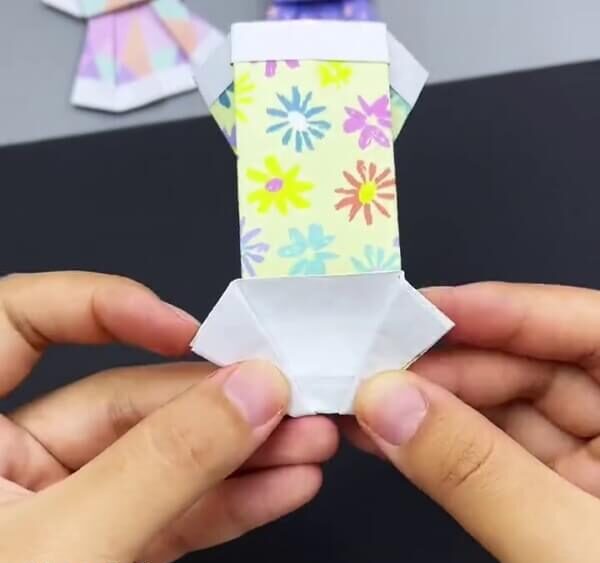
Fold the collar to the opposite side of the paper, as illustrated in the image.
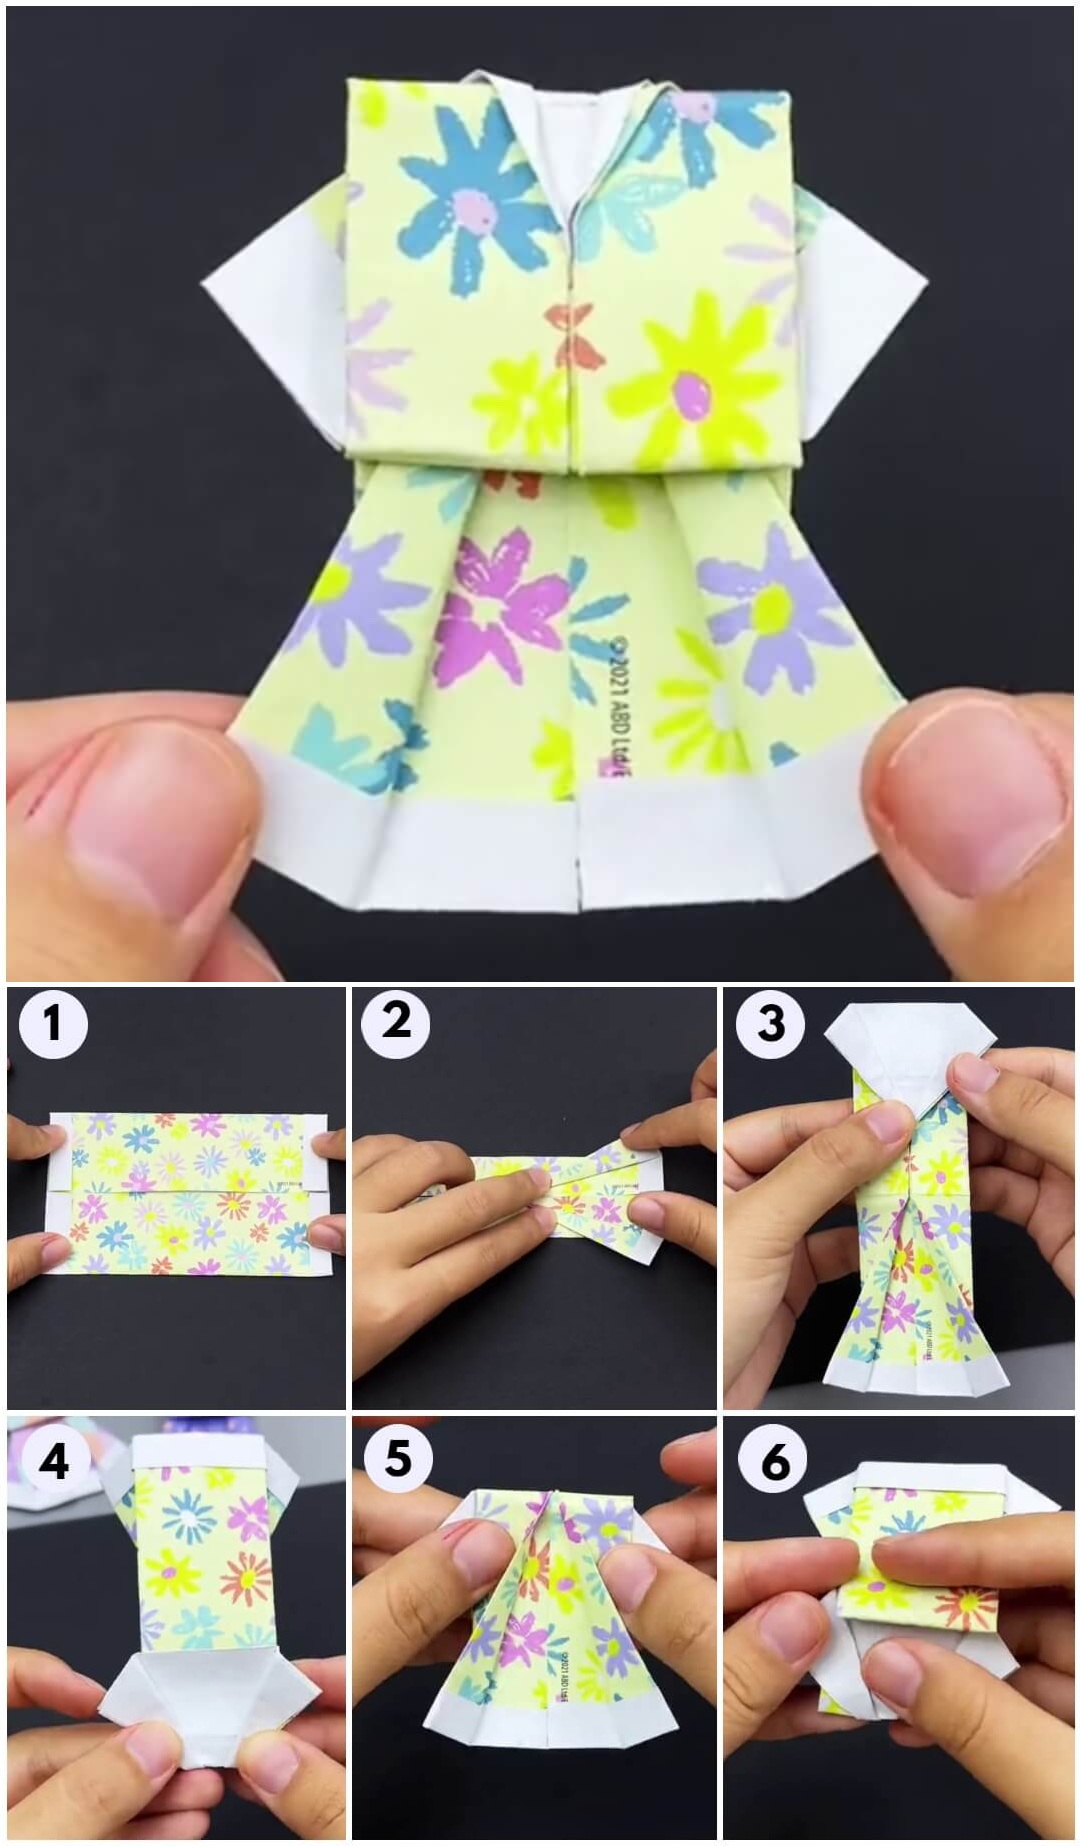
Step 8: Flipping Over
Flip the paper over to see the skirt section.
Step 9: Folding the Skirt to the Other Side
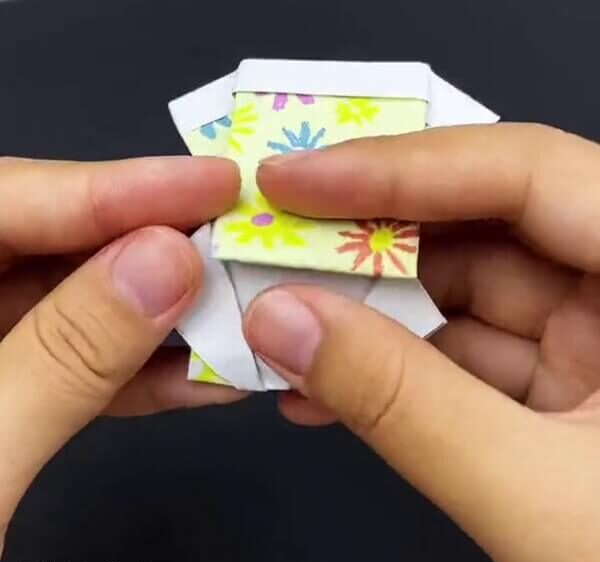
Now, fold the skirt over to the side where the collar was folded.
Step 10: Inserting the Part in the Collar
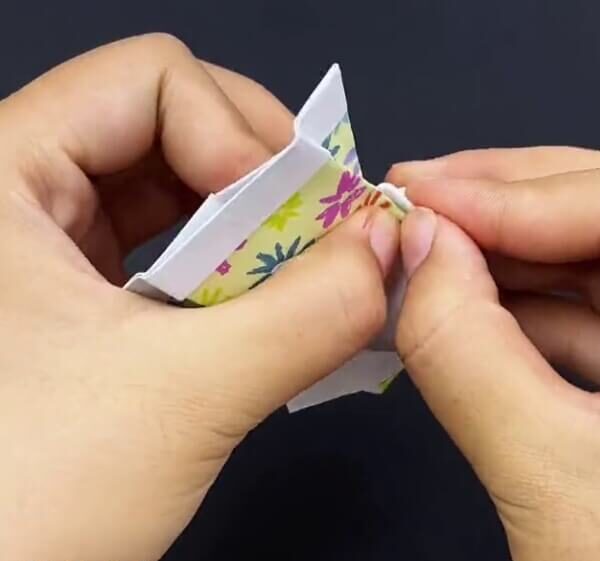
Carefully tuck the corners of the back rectangular skirt into the collar.
Step 11: Flipping Over the Figure
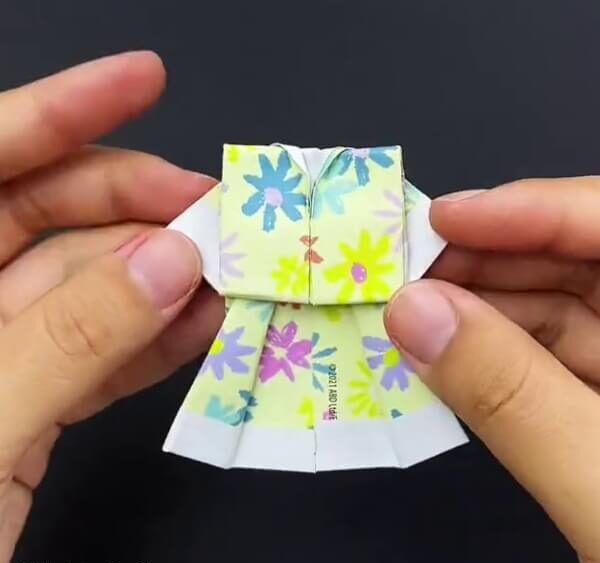
Turn the figure over to reveal a finished dress. Ensure all the creases are perfectly sharp to make the dress look its best.
The Final Look of the Mini Skirt Dress!
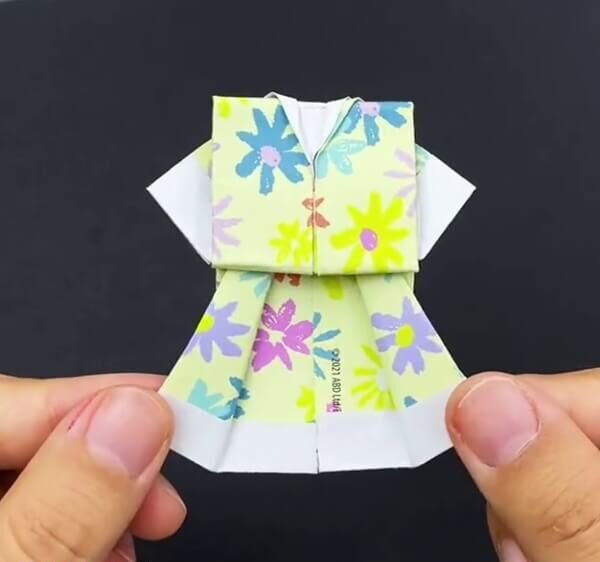
Voila! Your charming mini dress is now complete!
Everyone will admire this cute little dress, and young girls will surely want one just like it! You can also create many different dresses using these directions, experimenting with various patterns and textures! You can build an entire wardrobe! How fantastic is that?! Proudly display the paper wardrobe collection to friends and family, allowing them to appreciate your creativity and cleverness!
You and your friends will truly enjoy playing with these dresses! Go ahead and try making them!